So now that you’ve learned about Pillar #1 of Portrait Drawing and the basics of realistic shading, it’s time to tackle Pillar #2: Proportion and Accuracy.
(If you don’t know what I’m talking about, go watch the previous lesson here: Lesson #3)
Pillar #2 is all about create accurate line drawing and keeping everything in proportion. This is critical in achieving the likeness of a portrait.
Unfortunately this is also a HUGE sticking point for many beginning artists. It sure was for me!
When I was starting out, I struggled massively with proportion. The features on my portrait was so out of shape, you would think I was drawing a mutant or something.
But that all changed once I discovered a new method for how to draw a portrait. It literally took my portrait drawings from cartoonish and un-recognizable to looking like they were drawn by a professional.
I’ll explain the entire method and show you how to use it in this video:
Using the grid method, you will be able to draw any portrait very accurately without much effort. And it’s a great way to train your drawing skills if you are a beginner.
Some people might say that you should draw free-hand instead of using a grid, even if you are a beginner. But that’s like saying little kids shouldn’t use training wheels to learn how to ride a bike.
Griding is a training tool that can help you develop your free-hand drawing skills. Many beginners are able to learn to free-hand by practicing with a grid first.
(COOL TIP!: Griding is basically free-hand drawing except on a smaller scale. You can use a grid to help you practice your free-hand drawing at first.
As you become more comfortable, you can make your grid squares slightly bigger. This will force you to free-hand more.
Keep increasing the size of the grid squares and eventually, you won’t need to use a grid at all! Cool, huh?)
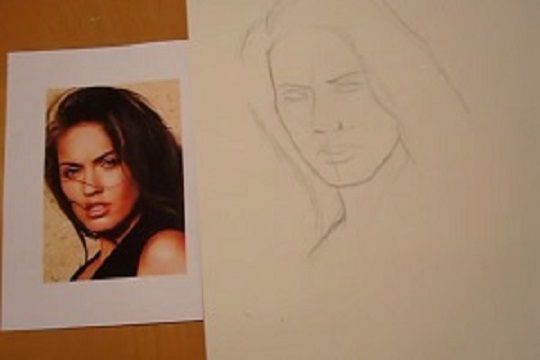
For now just follow the steps I showed you and draw the outline of the portrait yourself.
In tomorrow’s lesson, we’ll begin to shade in your rough outline and you can begin to see your drawing really take shape!
More specifically, we’ll learn how to draw the eyebrow. Oh and I’ll also reveal to you Pillar #3 of Portrait Drawing, so make sure to tune in.

If you wanna learn more about portrait drawing, check out my “Portrait Fundamentals Made Simple” course.
It’s a very beginner-friendly course that walks you through all the basics of portraiture, from constructing a basic head, facial proportions, drawing the features, and finally drawing a realistic portrait step-by-step.


![Drawing Realistic Portrait Series [1 of 8] – Intro & Materials](https://mydrawingtutorials.com/wp-content/uploads/2012/08/Portrait-Lesson-1.jpg)
![Drawing Realistic Portrait Series [2 of 8] – The Fundamentals of Shading](https://mydrawingtutorials.com/wp-content/uploads/2012/08/Portrait-Lesson-2.jpg)


thank you Ethan.
I thoroughly enjoy your lessons and look forward to the next one. Your commitment to have the lessons understood by us students is commendable. Thank you Eathan.
Love it , thank you
Thank you for sharing your style of drawing. I am back into drawing after 30 years and enjoyed watching your video. Thank you so much! I couldn’t remember how to get the iris of the eyes more realistic and you helped me a lot. Still have a problem with eyelashes for some reason or another.
JoAnn
hey @Samuel printer is not required for grid u can edit graph on your computer ….though I don’t have computer…I did it in my mbl with pic art….
hope it is helpful…good luck
hey Ethan…. u r doing a great job…good wishes from india… ♥♥
YOUR LESSONS ARE EXTREMELY HELPFUL. THANKS
exciting!!!! even if i”m tired from work I’m making time to watch your lesson..thank you so much and i just have one question what is the difference of 4b 4h 4f pencil? I’m so confused with drawing pencils
help i dont have a printer. how can i get the referce photo with gridlines
hi ethan.thanks for this video. it’s really helpful.before this, i hate drawing.after watching your video,i started to love drawing.thank you so much.
from afif naeem(malaysia)
Learning a lot and enjoy the video. Time stands still so I know I’m in the “groove”! Thank You!
Very helpful:-)
Very well explained. I enjoy your teaching. Many thanks. Salutes from Huelva (Spain).
can you tell me if the 5 , 6, 7,8 of 8 has been sent
If yes I did not reveive them
If yes can you send them to me because I miss them to continue as my progress with these really help me to have real good results
thanks very much the tutorials are really lovely
Hi Patricia,
Here are the links to other lessons again:
Lesson 5 – http://mydrawingtutorials.com/drawing-realistic-portrait-5-of-8/
Lesson 6 – http://mydrawingtutorials.com/drawing-realistic-portrait-6-of-8/
Lesson 7 – http://mydrawingtutorials.com/drawing-realistic-portrait-7-of-8/
Lesson 8 – http://mydrawingtutorials.com/drawing-realistic-portrait-8-of-8/
I thought that tutorials didn’t help me in drawing. Then i took a pencil and started to draw portrait. At the finish i said: Oh My God, It is really helpful. Thank you very much.
That’s awesome!
Hey! just to let you know, I really like your video’s!
but I also wanted to share with you that when you make the grid really thin you actually do not have to erase it before you color the drawing in, because you will still going to blend it. then you only have to erase the lines outside the drawing.
at last i know what is this greed and haw to make it .thank you.great teacher!
Thank you! Thank you!! Thank you!!!
Hi Ethan ;D
Thanks for ur generous videos i liked them allot and i started using some of ur techniques i really want ur opinion on sth really important so plllzz give me ur e-mail or any where i could discuss this thing with yah plz ;D
Hi Ethan, thanks for posting these lessons online. It’s exciting to learn something new and to get tips which can accelerate learning. I look forward to each new lesson. Best regards, Geordie
some of the old masters used the grid method, I have used it for those hard to draw subjects, love your tutorials
That is very true! Thank you for mentioning.
Thanks! Ethan for these valuable drawing tutorials. I think griding is a great way to practice proportion in a portrait drawing. Love the straight forward and uncomplicated form of your teaching, as well as all applications. In just these few videos, I have learned so much in pencil drawing. These are the best free pencil drawing tutorials that I have ever viewed. Thank you! Thank you! Thank you! Have a great day!
P.S. Look forward to the next vid!
why cant i makem all straight no matter what o do. and why so ,uch lines for a small eye
i think its good to start like that, but also we dont have to make everything like this; we tend to stay here and i think it would be nice to start trying proportion with our sight, not only with squares. eventough, you´re a good teacher and your drawings are very nice. thanks 4 everything (:
hey Ethan thank you very much for you support , i really want to learn how to drow like you . your lessons really help me thank again for videos
MAN YOU ARE THE BEST OF THE BEST!!!! TANKYOU FOR YOUR VIDEOS!!!
Thank you very much! You’re very welcome!
Never really realized the usefulness of the grid. There r so many pics out of books I hav always wanted to draw.
I’m glad it helps, Jeremy.
Hey Ethan, I just started your drawing tutorials and I’m loving them!
But, do you think you can put up an online Image of your eye grid drawing it’s kinda hard to see your drawing on the video with my small computer.. Lol…
Thanks.
~Eliza~
Hi Eliza,
Thank you for the compliment.
Sorry, but I don’t have the picture of the eye with the grid on it. But here is the reference photo of the eye itself:
http://mydrawingtutorials.com/wp-content/uploads/2012/08/eye-reference-photo.jpg
Hopefully that will help with your drawing.
Thanks for video i hope my drawing is as good as your when it is finished
Thank you I hop I can do it
I am staying with your leessons but i missed lesson # 3.
Thank you jim
Hey Jim,
Here’s the link to lesson 3: http://mydrawingtutorials.com/drawing-realistic-portrait-3-of-8/
(Hint, you can get to all 8 lessons just by changing the number in the web address (turn a “3” into a “4” or “5” or “6”, etc…)
I really like your videos you make this all seem so easy. And yes I am doing better with your help. Keep up the good work you do a great job.
Thank you Loretta. It’s great to hear that you are improving!
I have a heavy hand and no matter how hard I try, my grid lines turn out dark. I have always drawn freehand. I will keep trying the grid method though. I will not give up!
Awesome, Tammy!
hey Ethan… i like your Method but i like to draw freehand, not drawing the graph is it okay??
Yes, of course! The grid is only there if you need it.
Hello Ethan, Your tutorials are very nice and you have an easy manner and way of explaining. Thank you so much for your generosity in sharing your talent with us. I am learning a LOT. Thank you! Pat
Thanks, Pat. You’re very welcome!
Hi Ethan, I really enjoy your videos, and today was the best so far. I just know they will keep on getting better and I will learn a tot from them! I have always been “afraid” of the grid method, but you explained how to do it so that you can erase it. (I have always had a heavy hand!) I will give it a go. Thank you.
Thanks, Tammy. I’m really glad it helped. As I said the grid doesn’t have to be a crutch if you use it right. It can be an extremely valuable tool to help you develop your free hand skills.
I’m really glad to see that you are taking action. That’s the number one secret to success that a lot of people ignore.
BTW, I really appreciate you purchasing the Realistic Portrait course. Thanks for your support, Tammy 🙂
Hi Ethan, Thank you for our lesson for today. It’s 11:11 pm and I’m just getting the opportunity to view the video. I had to see it before going to bed. I don’t want to get behind in my lessons. So I will do my grid and drawing tomorrow because it’s late and I have to go to work in the morning. Thank you for the grid tip and I can see how that is a help tool towards free hand drawing. I’m very excited about trying the grid because it will truly be different for me because I only know how to draw free handed without tools and guides. So this is very good. Thanks again and have a good night.
You’re welcome, Akiraah. It’s nice to see that you are so dedicated with the lessons. You’ll definitely get a lot out of this and go very far with that kind of work ethic 🙂
hello Ethan, actually you are very good, and ago i used to say that i was not very good, but now after following all your instruction i think that i am getting better. thanks a lot. my brother is a very good artist and he did art as a subject and did it as his main subject. he used to tease me as i was drawing very badly. i really think that you must put more video on your site as you are a really good teacher and I LOVE DRAWING <3. thanks a lot Ethan…
high Ethan – i am pleased that there is someone who is willing to do something for free – i enjoy drawing althought i am unable to draw very well – i have found your blog interesting and full of very handy hints – one day i will be able to show my family how good i have become – (hopefully) i have only just joined your sight a few days ago – and am very interested to continue with it – looking forward to the next lesson – i dont get a lot of time for me to do what i want – at least i can print some lessons to do while sitting in the car or when there is no web service –
Hi Cheryl,
You’re very welcome! Helping people like yourself is the reason I started the website. I hope to build this site into a haven where us artist could hang out and learn from each other. Thank you for visiting and leaving your thoughts. I love reading comments like yours!
Very well explained. I’m looking forward to starting it. See you tomorrow.
Thanks Ethan, That Video was very helpful. I look forward to doing the next one.
You can make two clear overheads of your grid paper (dark grids). Place one under your drawing paper and the other on top of your reference photo. Makes it a little easier and is reusable.
That’s a really great idea, Margaret. Thank you for the suggestion. I will be sure to include that in the updated version of the course.
I am 64 yrs old and have been oil painting to over one year now. This tutorial is really helping me out including shadowing, blending giving my painting dimention and a realistic look. Many years back when I started drawing we used the gred method using only three lines to make the eye brows and eyes. It’s funny how I forgot alot of the old methods. Its like starting a new. And I have you to thank.
Hi Jean,
Yes you are absolutely right. Knowing how to draw realistically in pencil is very important to being able to paint well. I’m glad you are finding the lessons helpful.
Since starting to draw, I find this method the BEST! It keeps the balance of the drawing perfectly!
Thanks for sharing this.
You’re welcome! I’m glad it’s helping you too.
i think you are super super super good, but what works for you doesnt work for me, its also hard to see such close detail because on my computer your camera isnt the best. im only 13, im about 1/3 as good as you i want to get really good though. i think your eyes are amazing. too bad you cant help me.
Hi Emily,
Sorry about that. I try to make the videos higher quality next time. Thank you for bringing that to my attention.
I really like your lessons. And thank you for explanations about grid method.First I was a little disapointted, because a want to draw free hand, but then I have understood. Thank you. Sorry if I made mistakes in English.
You’re very welcome, Sabina.
Im 65 years old, I just decided to learn watercolor painting. I find your help very usefull..Thanks a lot.
You’re welcome, Jose. And thanks for being here.
Very very good thank you
You are very welcome!
Thankyou for sharing your knowledge and making things a lot easier yet effewctive for us beginners. Keep up your good work, you will make better artists of us and make us feel better tyo have a go .
Thank you for the comment, Frank. And you are very welcome!
Hi Ethan,
I’m definitely enjoying the lessons you’re showing! I had a brainstorm about the grid for drawing. I have a light table and I drew the grid in marker, placed a plain piece of paper over it, and placed it on the light table while drawing. This eliminated the need to draw a grid on my drawing paper and then erase it later. I was also able to re-use the original grid for subsequent drawings. All I had to draw was the grid on the original.
Thanks for the lessons,
Mary Savard
Hi Mary,
That’s a brilliant idea. I will definitely have to add that to the lessons when I get a chance. Thanks for the great tip!
I love your site~~your blog~~with so many beautiful and amazing pictures in your page~~~you know the point is that your stylish writing is helpful ~
Thank you 🙂
Jana
So helpful. Thanks
Thank you for this compliment.
These patterns are just doodles. Anyone can do it. Some call it zentangle inspired art, but in fact it is doodling.
Well, that’s the best looking “doodling” I’ve ever seen!
Love the great teaching, very helpful hun !!!
Thank you for this tutorial. I`m from Germany, I found the link to your lessons on FineArtEBook. First I could not believe that these lessons are for free, but it`s the truth.
You are doing a very good job. Thank you very much.
I want to tell you so much more, but my english is not so good.
Hi Seven,
Your English is great! Thank you very much for the kind comment. BTW, those are some amazing pattern’s on your site. What are those?
Very effective tool for beginners – I love to see the excitement in my students’ when they find out how easily they can draw complex subjects with a simple grid!
Hi Karen,
I like your website. Very cool. And thank you for the comment!
This was a must for me! Thanks a Bunch! Can’t wait for the next lesson.
Thanks alot Meo. I think you’re really going to like the next one.
This is exactly what I needed. Thank you.
You’re welcome, Cristina. I’m glad you liked it.