
If you wanna learn more about portrait drawing, check out my “Portrait Fundamentals Made Simple” course.
It’s a very beginner-friendly course that walks you through all the basics of portraiture, from constructing a basic head, facial proportions, drawing the features, and finally drawing a realistic portrait step-by-step.
Lesson Details
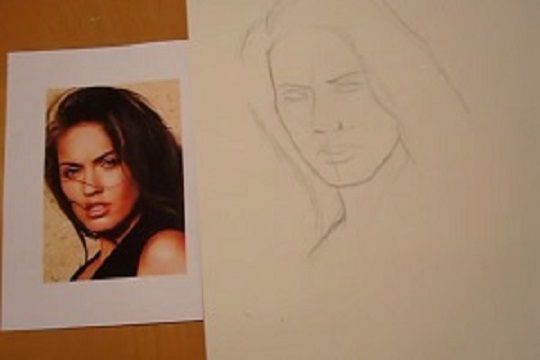
Step 1 – Sketching the Layout
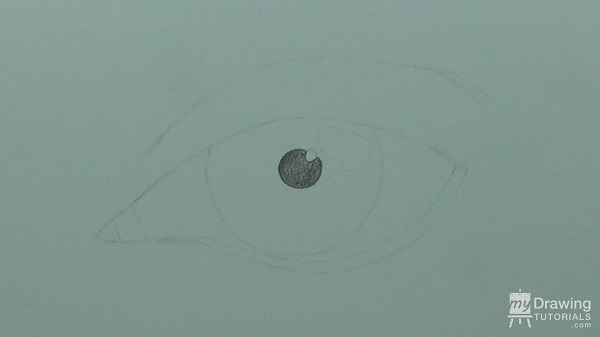
The first step is to sketch in the layout. For this drawing, I going to use a simple grid to help me keep things in proportions.
When drawing the iris, it can be easy to make the circle misshapen or disproportional. To help with this, you can draw through the entire circle to make sure that everything matches up. And I’ll also draw in the pupil and mark out the highlight areas.

Once the layout is complete, erase the guidelines.
Now for the shading. I always like to start with the easiest part first, so I’ll use a 4B pencil and fill in the pupil.
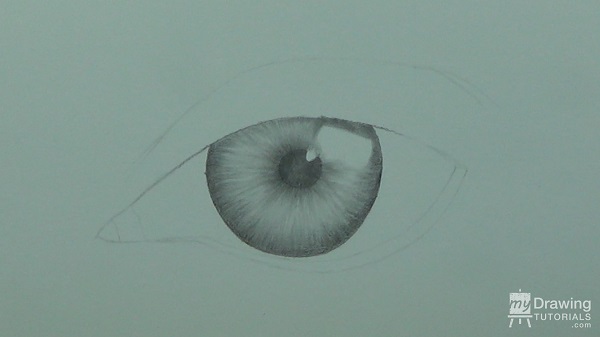
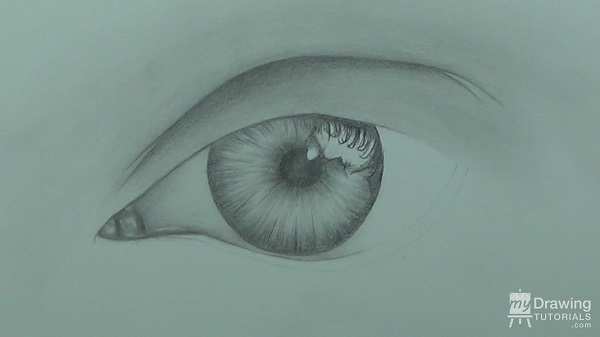
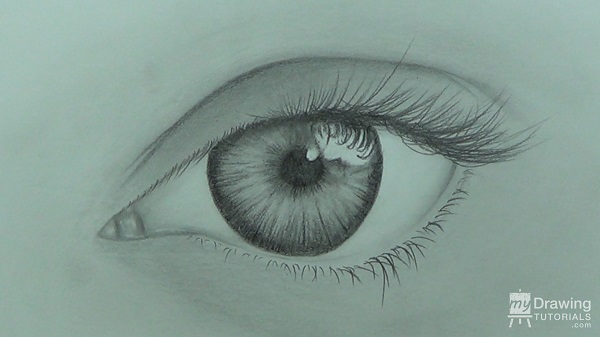
Next is the iris. The eye that we are drawing is blue, so the iris will not be as dark and will have many streaks in it. To capture this, I will create many tiny lines around the outer edge pointing towards the pupil. And of course, I will leave the highlight areas blank.
Now, I will take a blending stump and smooth out the shading.
Next, I will draw in little line in the shape of fish hooks in the highlight areas. These will represent the reflections of the eyelashes. Once the eyelashes are drawn in, these little details will really add to the glassy effect of the eye.
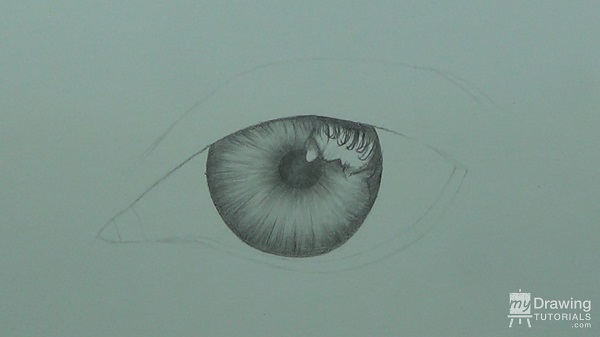
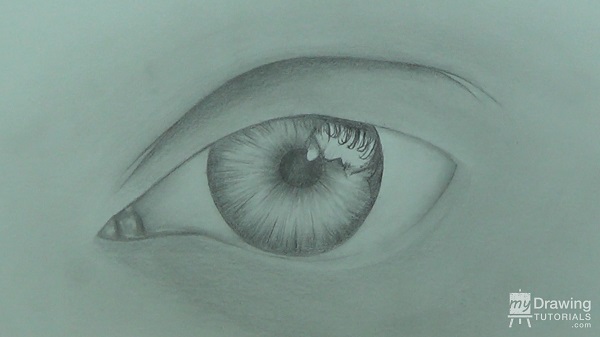
To make the rest of the eye appear 3 dimensional, I will put in a shadow in the crease of the eyelid. And I will blend it out and have it gradually lighten as it moves towards the eye.
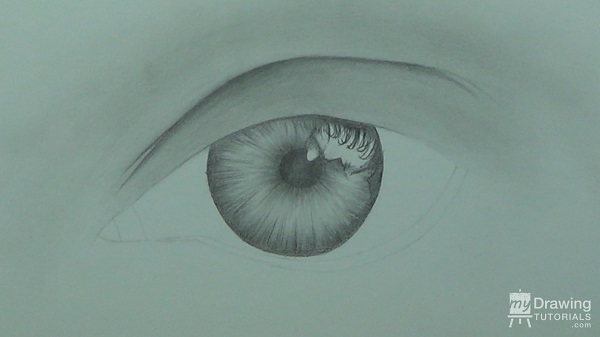
Blending large area with a blending stump and making it look smooth can be difficult. So to make this easier, I will use an artist chamois to blend the larger areas. A chamois is basically just a piece of cloth that artists use to blend graphite.
Next, we want to add some shading to the white of the eyeball as well. The eyeball is a sphere shape, so in order to make it appear round, I will add a dark tone in the left corner of the eyeball and then have it gradually lighten as it moves towards the iris.

In this drawing, the light is coming from the right hand side, so the right side of the eyeball will not have much tone in it.
Next, let’s put some shading in the tear ducts. Again the tear ducts are rounded forms, so you’ll want to put a dark shade in the creases and fade it out as it moves towards the center.
And to make the tear ducts look even shinier, I will shape my kneaded eraser into a fine point and pick out some highlights.
Now let’s put in some tone in the lower eyelid.
And now for one last crucial detail… the eyelashes.
When draw eyelashes it’s important to capture the direction of the lashes properly. It’s not important to copy all the individual lashes as you see in the reference, but you do want to get their general pattern correct.
Essentially the lashes will be pointed toward the right in this corner of the eye.
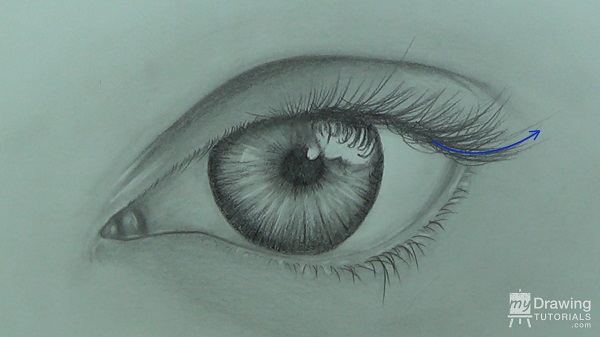
And as they move towards the left, they will gradually begin to point towards you.
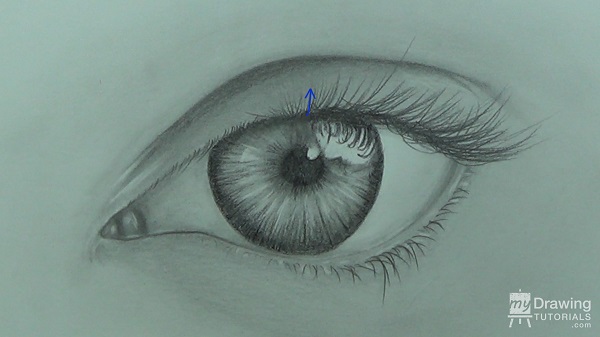
Then, pass the mid-point, the lashes will shift gradually and begin pointing towards the left.

Lashes are easily the trickiest part of draw eyes so don’t be afraid to practice drawing them a few times on a piece of scratch paper first before you try it on your drawing.
The lower lashes will be much shorter and no where near as numerous.
Now that all the components of the eye are in place, it’s just a matter of adding contrast and refining the details.
I’m going to use a General’s 9xxb pencil to darken the iris and pupil.
I like the 9xxb pencil because it can create very dark tones without leaving a graphite shine. But if you don’t have this pencil, a dark graphite or charcoal pencil will also work just fine.
And I’ll also darken the tones in the other areas as well.
Lastly, I will shape my kneaded eraser into a fine point and pick out some highlights to give the drawing the little bit of shine.
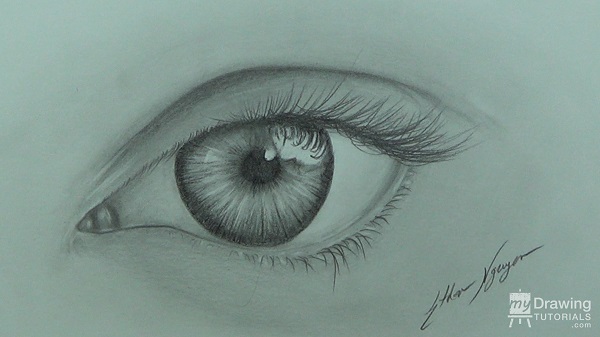
And that’s it, we’re all done!
 Drawing is always a fun thing to do, and if you want to give a special gift to those who love drawing, custom pens can be a great choice. Be it ink pens, gel pens, ballpoint pens, or pencils, you can get custom designs and a variety of textures at Custompens.com.
Thank you to Custompens.com for sponsoring this post!

![Drawing Realistic Portrait Series [1 of 8] – Intro & Materials](https://mydrawingtutorials.com/wp-content/uploads/2012/08/Portrait-Lesson-1.jpg)
![Drawing Realistic Portrait Series [2 of 8] – The Fundamentals of Shading](https://mydrawingtutorials.com/wp-content/uploads/2012/08/Portrait-Lesson-2.jpg)


Wow, but too hard LOL
Thank you for the tutorial on drawing an eye. I did pick up some useful pointers. Thank you.
Wendy Leedy
hi
I don’t understand
Very good