
If you wanna learn more about portrait drawing, check out my “Portrait Fundamentals Made Simple” course.
It’s a very beginner-friendly course that walks you through all the basics of portraiture, from constructing a basic head, facial proportions, drawing the features, and finally drawing a realistic portrait step-by-step.
Lesson Details
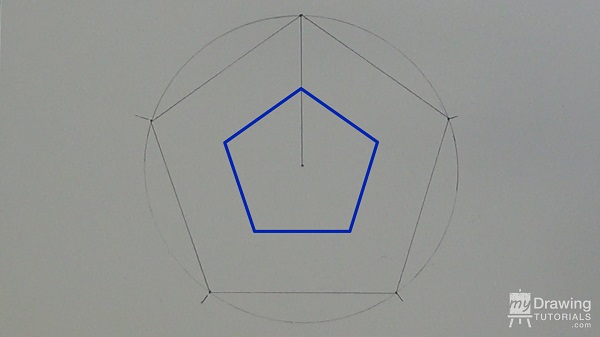
Step 1 – Draw a Simple Pentagon
The first step to drawing an impossible pentagon is to draw a regular pentagon. You can draw your pentagon free hand. Or if you want to make it a perfect pentagon, follow these steps.
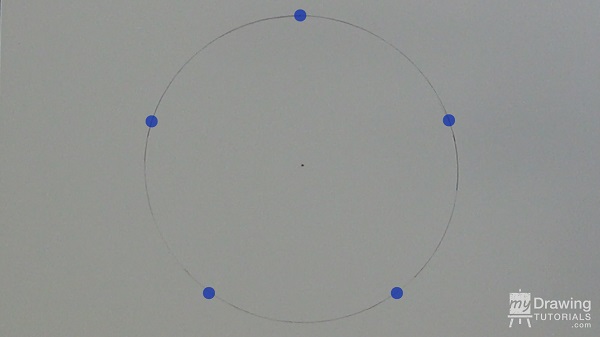
Mark a dot in the middle of your paper. This will be the center of your impossible pentagon.
Use a compass or circle template to draw a circle around this dot. The five points of our pentagon will be evenly spaced along this circle.
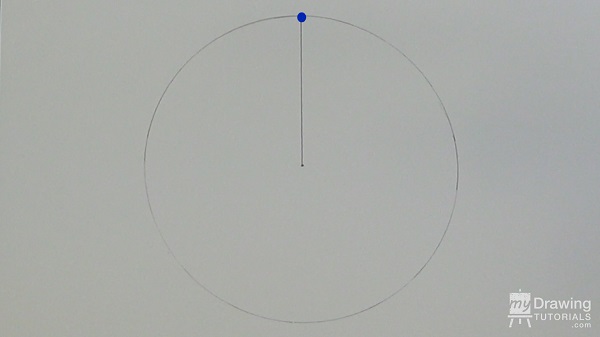
To find the first point, simply draw a vertical line from the center dot to the circle.
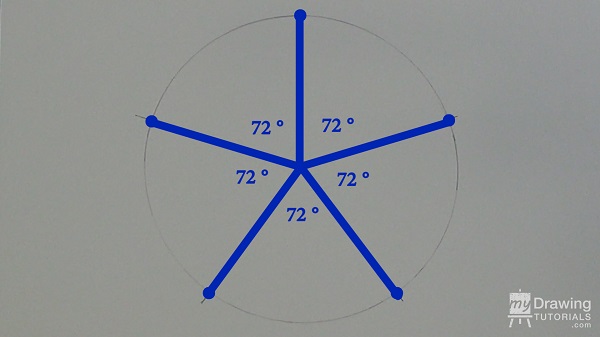
Now let’s find the other 4 points. Use a protractor to measure 72 degrees from the vertical line and repeat this all the way around the circle.
When you are done, you should have 5 evenly spaced points along the circle that are all 72 degrees apart.
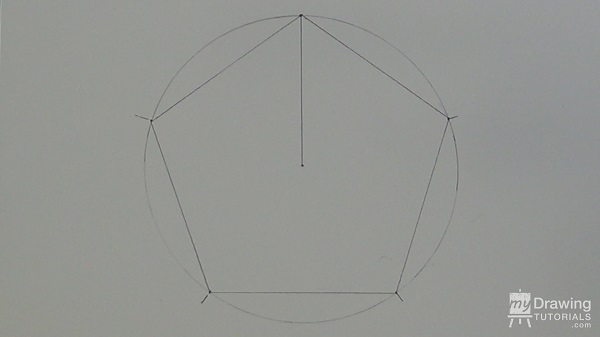
Now just connect these points to form the pentagon.
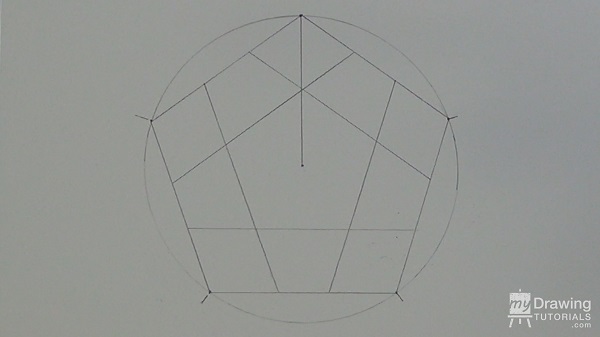
Step 2 – Turning It Into An Impossible Shape
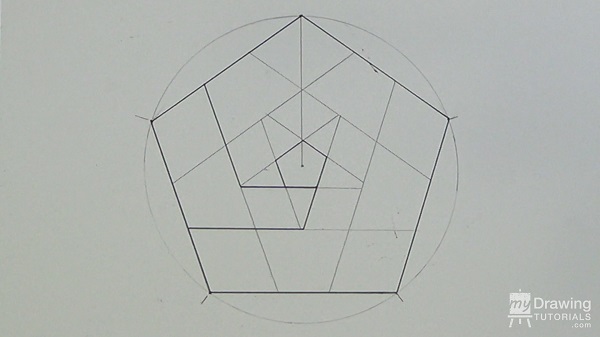
Next, let’s draw a smaller pentagon inside this one.
To do this, simply draw all the sides of the big pentagon again, except move them inward so that they form a new pentagon.
To make sure the spacing of all the lines are uniform, I’m going to use the width of my ruler as a measuring unit.
Ok, so there’s our medium pentagon.
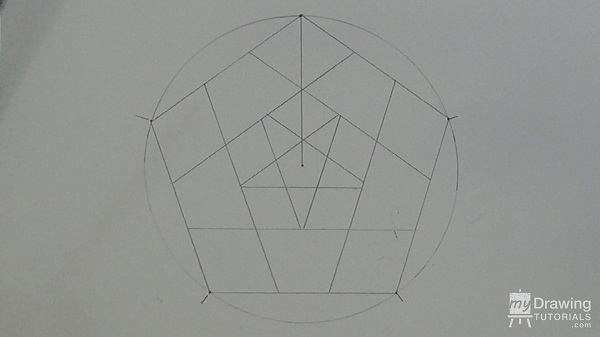
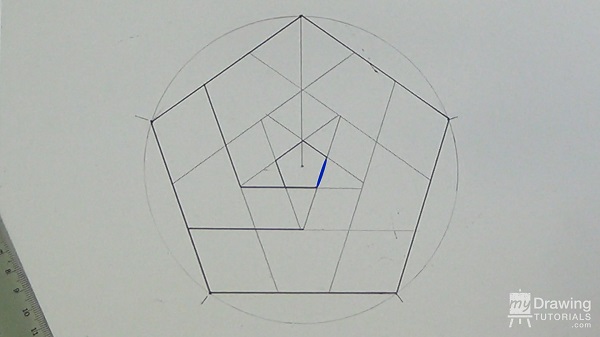
Now let’s repeat the process and draw yet another pentagon inside this one.

This time, I want the spacing to be a bit smaller, so I’ll use the width of my protractor to measure things out.
And there’s the small pentagon.
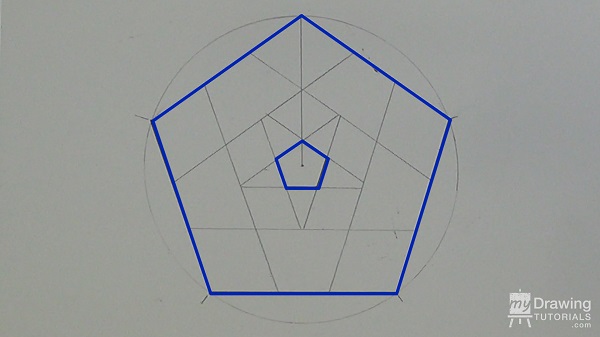
Next, let’s ink in the large and small pentagon, because we know for sure these are the lines we want to keep.
I’ll be using a 1.0 Copic Multiliner pen.
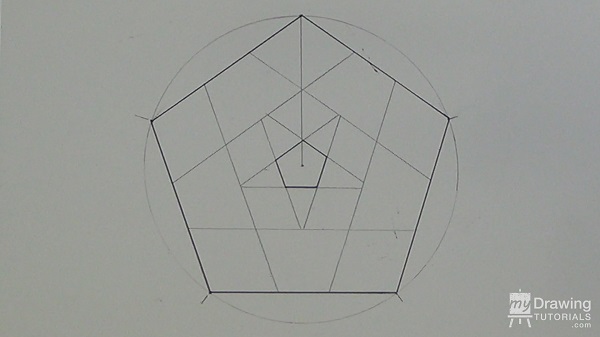
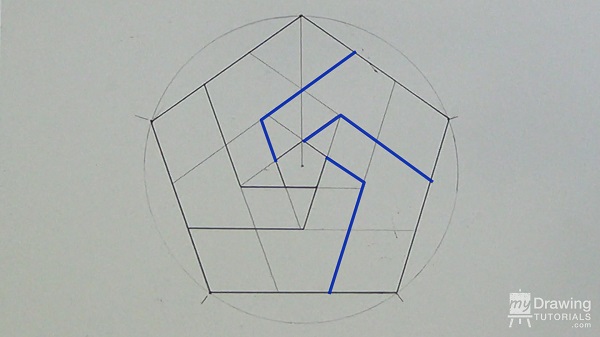
Now let’s ink in the rest of the drawing. These a lot of lines here so it can get a bit confusing.
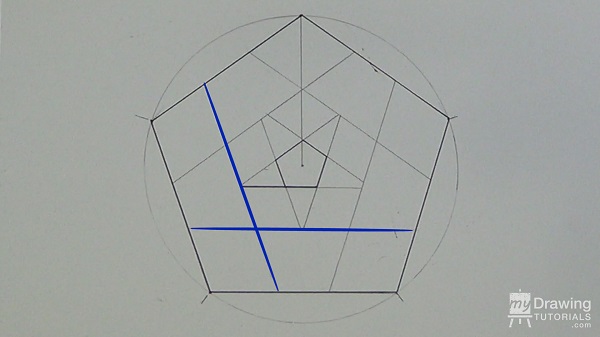
The best way to think about this is to imagine that you are trying to get from the large pentagon…

…to the small pentagon…
…using these roads.
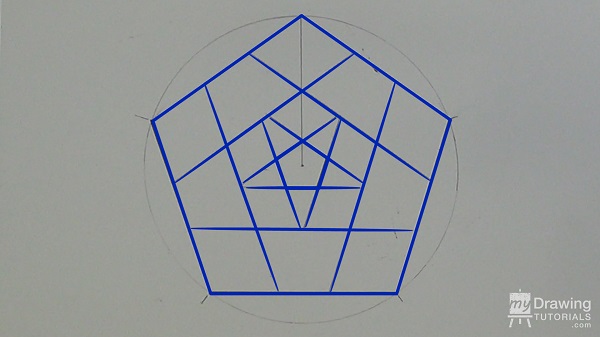
Here’s what I mean…
Let’s start with this corner.
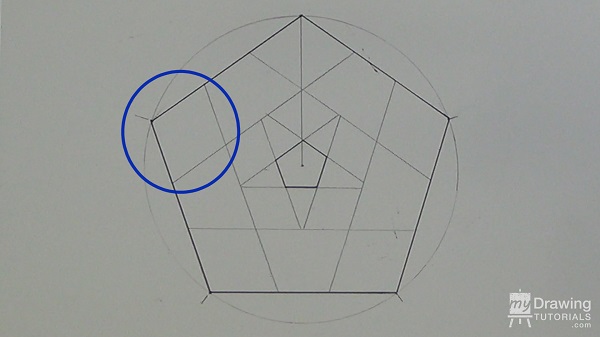
Here you have your choice of two roads.
For the first one, it doesn’t matter which one you pick. So let’s just go with this one.
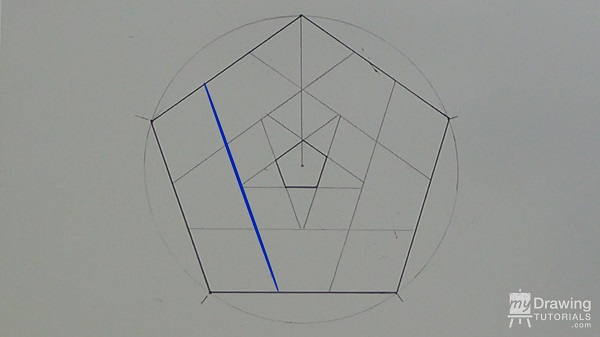
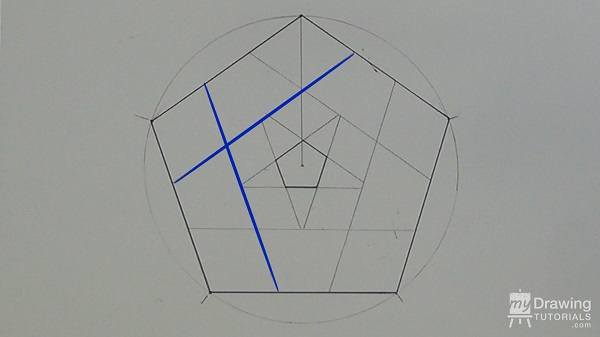
Follow this road down until you reach the far edge of the small pentagon.
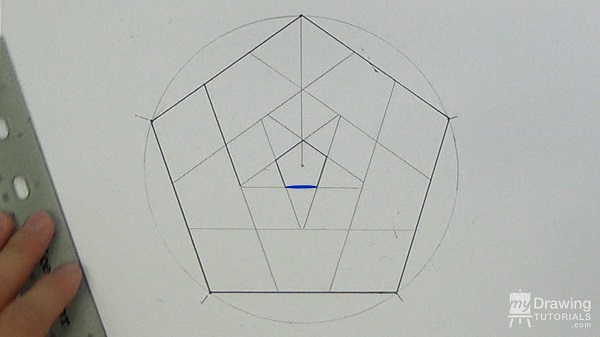
Then make a turn to connect to it.
And that’s it.
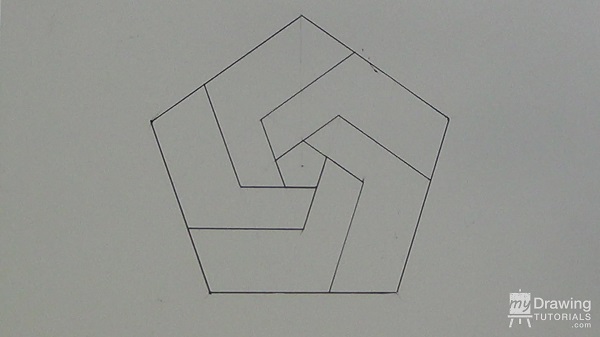
Now let’s do this corner.
Again, we have a choice of two roads.
But since this one is already taken…
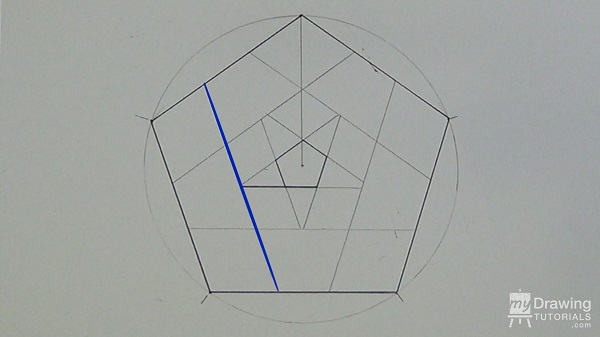
…we’ll have to use this one.
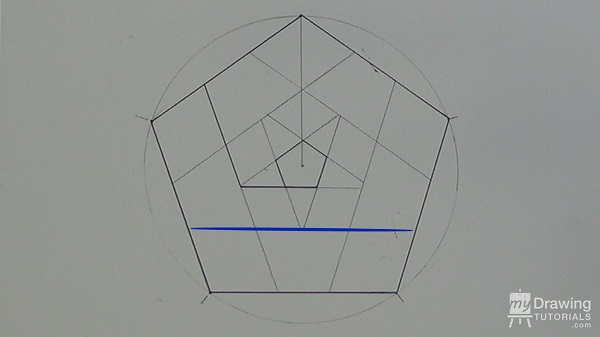
Once again, follow this road down until you get to the far edge of the small pentagon.
And then make a turn to connect to it.
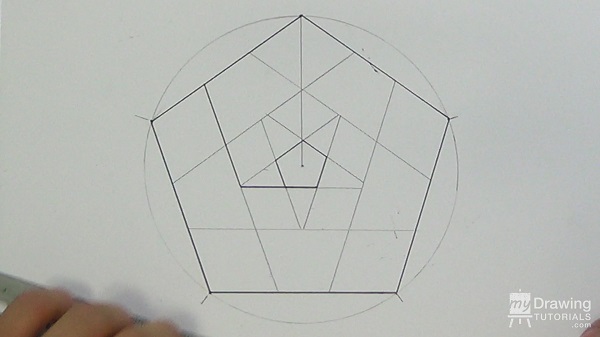
Now let’s repeat this process for the other three corners.
Once you’re done, just erase the pencil guidelines to reveal our impossible pentagon.
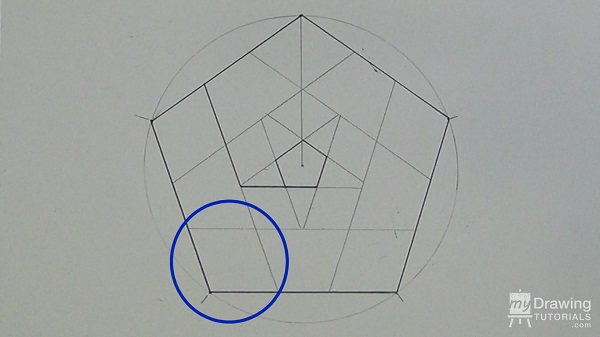
Step 3 – Inking and Shading
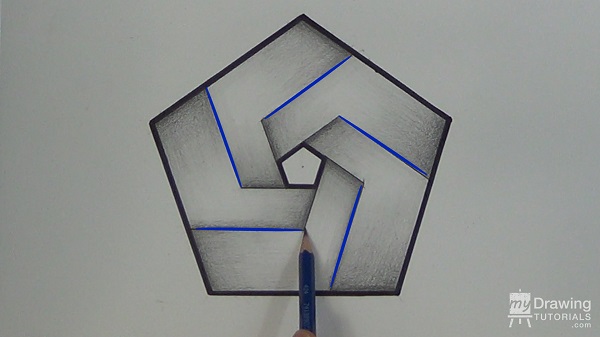
To make the drawing pop, I’m going to use a large Sharpie marker to add a thick border at the outer and inner edge of the pentagon.
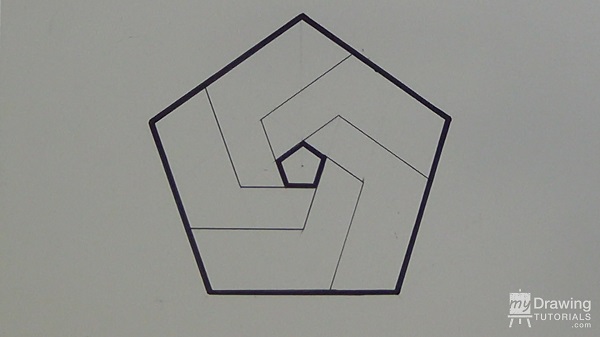
Then I’ll use a 2B & 4B pencil to add a gradation at the 5 inner corners of the shape.
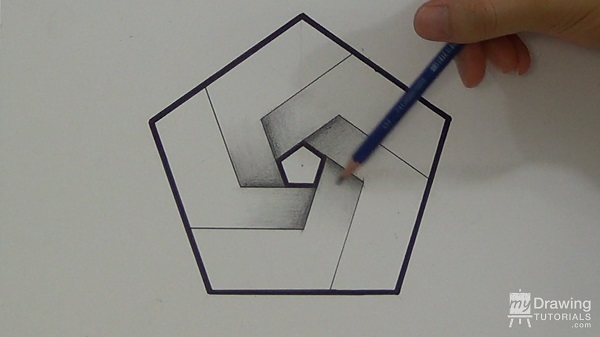
And I’ll also add a gradation at the 5 outer corners as well.
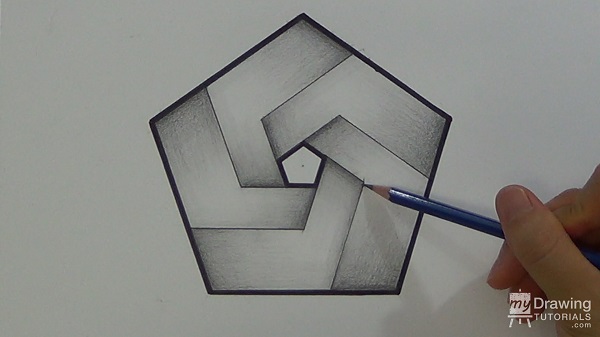
And lastly, I’ll use a 4B pencil to add a hard shadow under these lines, in order to create the illusion that the parts are overlapping each other.
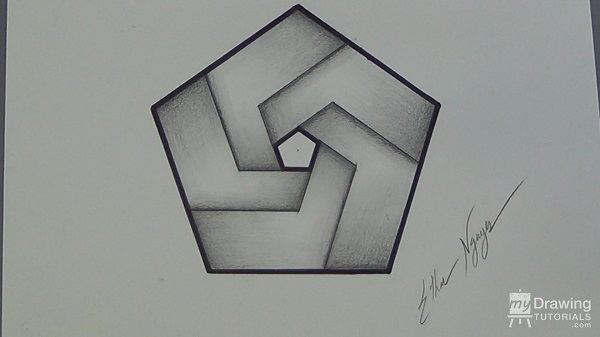
And we’re all done!


