In today’s lesson, we will continue to fill in your drawing by shading in the iris and pupil. This is perhaps the most important detail in your drawing and it will really bring everything to life.
In this video, I’ll show you how to draw realistic eyes and shade the iris to give it a “glassy” and shiny look:
As you can see, it’s not all that hard to draw a really realistic looking iris. To be honest, if I worked on that drawing a little bit longer I could make it look even more polish.
So now it’s your turn to try it yourself.

If you wanna learn more about portrait drawing, check out my “Portrait Fundamentals Made Simple” course.
It’s a very beginner-friendly course that walks you through all the basics of portraiture, from constructing a basic head, facial proportions, drawing the features, and finally drawing a realistic portrait step-by-step.


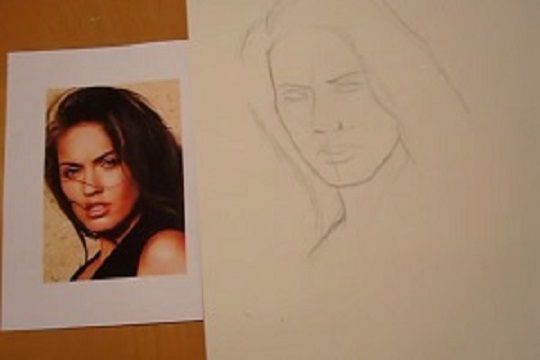
![Drawing Realistic Portrait Series [1 of 8] – Intro & Materials](https://mydrawingtutorials.com/wp-content/uploads/2012/08/Portrait-Lesson-1.jpg)
![Drawing Realistic Portrait Series [2 of 8] – The Fundamentals of Shading](https://mydrawingtutorials.com/wp-content/uploads/2012/08/Portrait-Lesson-2.jpg)


example of eyes is outstanding. How, if that same eye size was reduced to fit an 8×10 drawing of a face, would all those details be accomplished?
I am so glad my daughter turned me on to your tutorials. Very helpful and has already started to improve my drawings. I will purchase to lessons soon. Thank you.
I am still having problems with the strokes to get the effect need. The further along the more the strokes are important. Maybe a close up after certain sections to show the strokes may help. Just a thought to help me and others out, Practice practice practice.
Thank you for tutorials, i find it very hopeful.
But it goes a bit too slow.
Many thanks
you are a super teacher, thanks
Your lessons are very good but I have other things I must do right now so please stop sending them. I may get back to you later. Jeanne
thanks a lot ,v.v good teaching movement,nice speech!.best of luck.
Hi Ethan,
Thanks a lot for the lessons so far. I do have a question however. The first time I drew the eye, it actually looked ok-ish. What bothered me most about it though, was that black wasn’t really black. So I went out and bought a charcoal pencil, but drawing the thin eyelashes seems practically impossible. Do you have any advice for me?
Thanks.
I know what you mean. Charcoal are not really meant for then lines. Either you could just use the charcoal for shading the areas that you want really dark and doesn’t need a lot of precision and use a regular pencil for the rest of the drawing. Or you could use a softer pencil (4B, 6B, etc) and sharpen it and use it for shading and drawing… if you prefer your drawing to be really dark.
I am very impressed with the type of artistry skills thus far.
I have started again drawing after 30years.
Looking forward for next lesson.
Thanks again.
Serine
thank you so much. Great tuition amazing realism. Looking forward to your next instruction. Thanks again, Mary.
Your teachings are so helpful!
eathan, I love you vedio’s when I click on the last one #8 it came on then is was gone can you please resend it. than you
where can I get a picture of the eye lyn
Hi Lyn,
Thanks for asking. I just uploaded the reference photo so you can print it out and draw along. It’s over a lesson number 4: http://mydrawingtutorials.com/drawing-realistic-portrait-4-of-8/
Hei Ethan,
Did you get my Email? i sent you one and you didnt reply.
Shammoon,
Hi Ali,
No, I’m sorry, I did not get it. Could you send it again?
Hi Ethan….I am enjoying these daily lessons enormously. Your style of teaching is friendly and relaxed, which makes it so much easier for a beginner (such as myself) to pick up a pencil with confidence! I’m able to follow the lessons easily and am learning a lot……
You’re awesome!
I like all your videos.
Just love how the blending and drawing technique brings life to the eye for that realistic appearance. What a difference tones of shading make in a drawing. I’m amazed!
Thank you very much Ethan, for sharing in this lesson. You’re a good teacher ;o)
I know right. What a big difference it makes when you apply the tortillon and blend out the tone. I love seeing the transformation when I draw. Thank you for the comment!
wow…!!!my eyes now looks so real thank you ethan for the tutorial..!! =)
awesome! I’m so glad to hear that. thank you, Martin!
Awesome! My eyes look much better now. Thank you Ethan!!!
Awesome! If you’d like, you can send in your finished drawing and I’ll post it up on the site.
Thank you Ethan for these wonderful and helpful at sessions. I’ve been clicking onthe wrong tab to realize i hadn’t hit the like tab. However i’m doing it now:0.
lol. Awesome. Thanks for the support, Akiraah.
Ya know you are a very talented person and I for one appreciate what you have done for free online but, like others you draw just the eye and its true the eyes are very important but my students askedafter watching your tutorial, when is he gonna show the steps for doing the full portrait as your invitation indicates? I think that was aa good question. What do you think?
Yes, I was a very good question. Portrait drawing can be a complex topic and I really wanted do lessons where the student can come out with a finished drawing. That’s why I had to narrow it down to just the eyes in order to keep the lessons manageable.
I will be putting out more tutorials that covers how to draw other parts of the face. But I will admit that there’s a lot more to this topic than I can cover in these free lessons. I’ll do the best I can.
But if you are interested in more in-depth training, you should consider my Realistic Portrait course.
luv luv loved it – do agree though with which pencil to use –
Just one Observation… I think it would Help your followers if you could remember to Say which Grade Pencil you use at each Stage! HB, H,2H,B,2B Etc…!
Just a Thought!
Good Informative Videos though… well Done! 😉
Thanks for the suggestion, Jeff. The lessons in this series is mostly done with a 2B lead pencil. But in future lessons, I’ll be sure to name the material specifically.
Find that your tips have improved my pictures amazingly – thanks
This is helping me to improve my drawings immensley. Many thanks
I would have done it differently,thanks for the info. I’m enjoying the lessons.
vrery informative,great vidio.
excellent how you did that to make that eye look realistic. I am truly impressed. I am learning so much. Thank you
Really glad you are improving, Jean.
It is amazing what a person can do , once shown the way to do it .
sold two portraits today in our exhibition I realise that my next efforts with your help will improve when I do my next offerings . Thanks again you areso helpful Eira
WOW! Congratulation, that’s amazing.
Great
I like to ask a question that you may not want to do; if you do not please feel free to tell me, it will not hurt my feelings at all.
Do you mind if I down load your tutorials to a cd? I am a man of my word and I will tell you now that I have no plans to make money from them; I hope that you believed me.
You may have them set up where they cannot be download.
Any way add me as one of you devoted fans. I have learn so much from your videos.
Thanks again for every thing.
Omar
Hi Omar,
Are you talking about the free videos lessons? If so, yes, you can absolutely download them and feel free to share them with anyone. If this is what you are talking about, then please just let me know and I will make the download link available under each video.
And thank you for being a fan!
This is really good. My children are already impressed with my improvement so far.
Great job, Meo. I love hearing that.
wow this is very helpful. I’ve always have struggled on drawing the eye.
Glad it can help, Jayson.