
If you wanna learn more about portrait drawing, check out my “Portrait Fundamentals Made Simple” course.
It’s a very beginner-friendly course that walks you through all the basics of portraiture, from constructing a basic head, facial proportions, drawing the features, and finally drawing a realistic portrait step-by-step.
[UPDATE] Congratulation to Scott Kerschner for being the winner of the giveaway! Scott, I sent you a Facebook message. Please just reply with your shipping address and I will send out the prize right away.
Thank you to everyone for your support and participation! Please go here to see the current running contest: https://mydrawingtutorials.com/giveaway
Lesson Details
Drawing Materials
For this lesson, I’ll be using
- HB & 2B & 4B pencil
- 1.0 Copic Multiliner pen
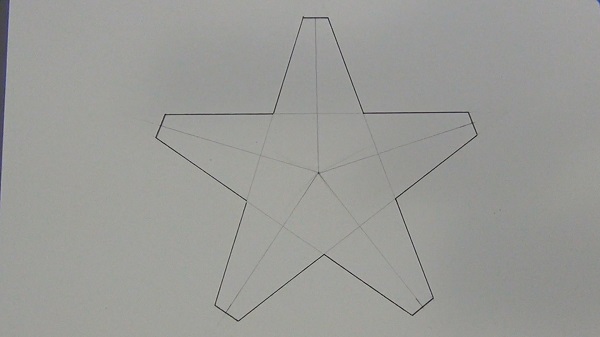
Step 1 – Draw A Regular Star
The first step is to draw a normal star shape. I want to make this star as symmetrical as possible so I’m going to be using my trusty ruler, but feel free to draw your star free-hand.
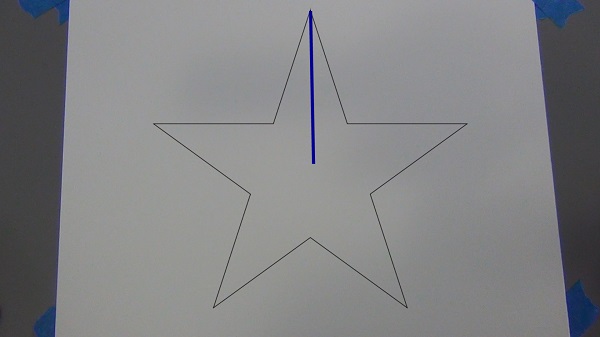
First, put a dot in the middle of your paper. This will represent the very center of your impossible star.
Next, draw a perfectly vertical line going up from this dot. The length of this line will represent the length of the branches of your star. In this case, I’m going to make my line 4 inches long.
Ok, so we got one of the five branches. Now it’s time to draw in the other ones. To do this, imagine that there is a circle around the center dot and you want to divide this circle into 5 equal pieces. And you can use that first vertical line as your starting point.
You can just eyeball this. Or if you want to be really exact about it, you can use a protractor to measure it out. You’ll want to make the angle between each lines 72 degrees.
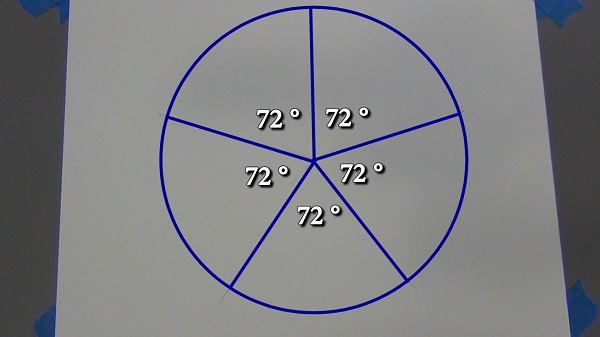
When you’re done, you should have 5 evenly spaced lines pointing out from your center dot. And these lines should be the same length as your first vertical line.
Now just connect the ends of these lines in this pattern to form a star. And voilà! We have a perfect start.

By the way, if you find all this measuring to be too technical, feel free to just draw your star free-hand.
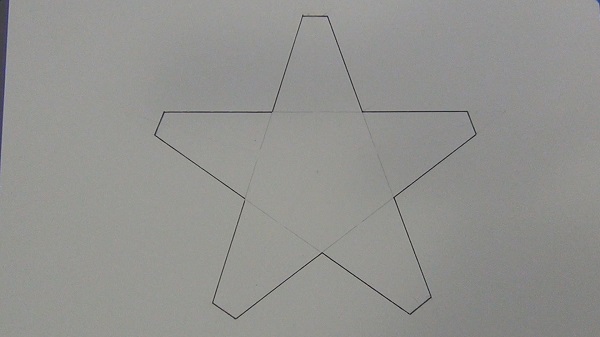
Ok, hard part’s over. Now we can turn this regular star into an impossible star.
Step 2 – Turning “Regular Star” Into Impossible Star!
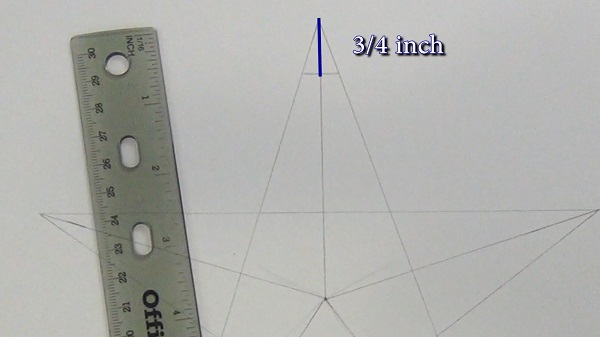
Now, go to the tip of one of the star branch and measure a small distance down. Then draw a horizontal line across this point.
Then repeat this process for the other 4 star branches. Just be sure to keep spacing uniform through out.
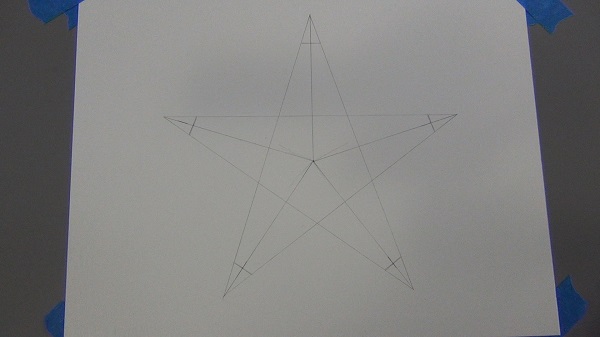
Next just erase the tip of each of the branches.
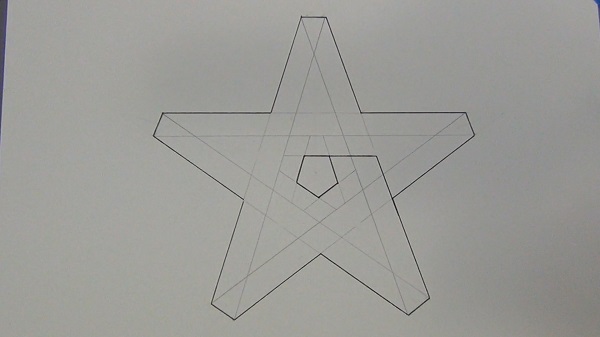
So before we go any further, let’s ink in the lines that we want to keep to avoid confusion. I’ll use a 1.0 copic multiliner pen to in the outline of our drawing.
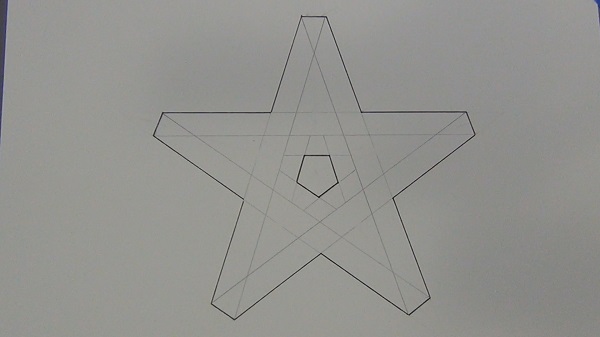
And let’s just erase some these guidelines so it doesn’t get too messy. I’ll keep these guidelines that form a pentagon as they’ll come in handy later on.
Now just connect the corners of our star-like shape in the following way.
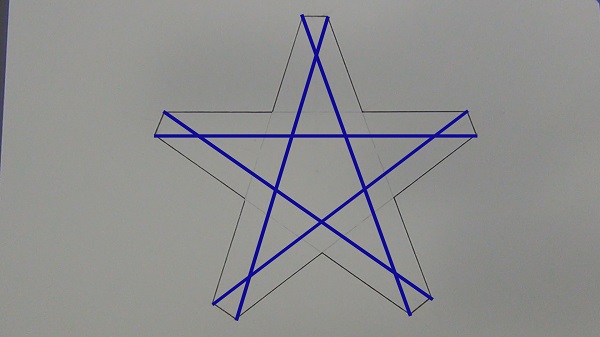
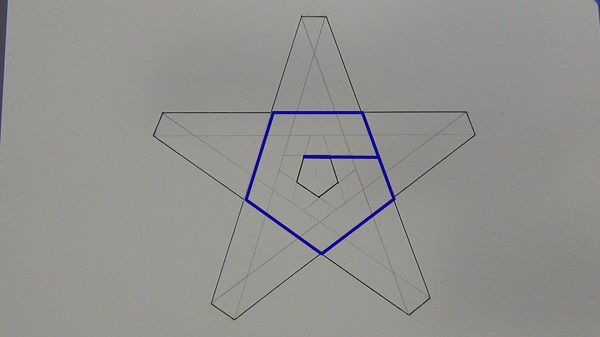
Notice that we now have 2 pentagon shapes at the center of our drawing. A large pentagon. And a medium pentagon. Now let’s draw a third pentagon inside the medium one.
The best way to do this is to draw the sides of the medium pentagon again, expect move them inward so that they form a smaller pentagon.
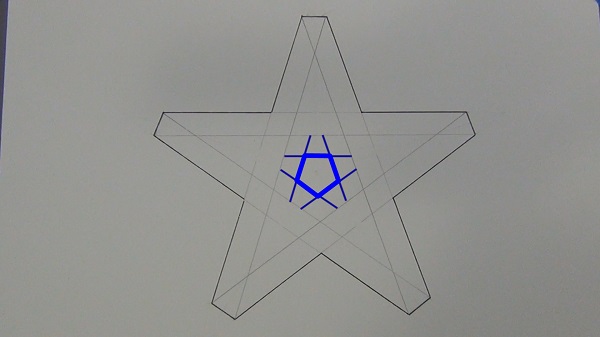
Now let’s ink in this small pentagon.
To ink in the rest of the drawing, just imagine that you are trying to get from the small pentagon to the large pentagon.
Here’s what I mean…
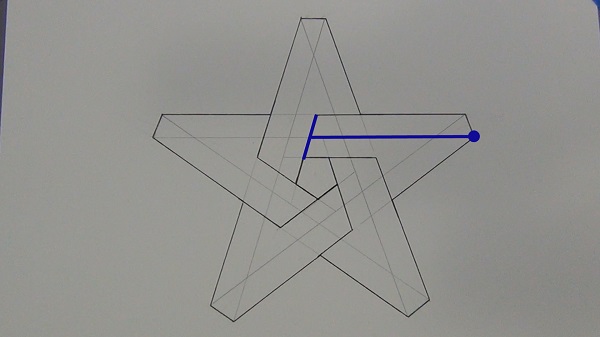
Let’s start with this side of the small pentagon.
To get to the large pentagon, you can either go left or right. For the first one, it doesn’t matter which one you pick, so let’s just go right.
Draw a line from the small pentagon to the large pentagon. Once you reaches one of the sides of the large pentagon, make a turn and go along that side until it ends.
Ok, let’s move on to the next one. Once again to get to the large pentagon, you can go left or right. But since the left side is blocked, we’ll have to go right. And once you reach the large pentagon, make a turn and run along it’s side.
And just repeat this process for the remaining 3 sides of the small pentagon.

The last step is to connect this line with the tip of the star.
And let’s do that for the other 4 lines as well.
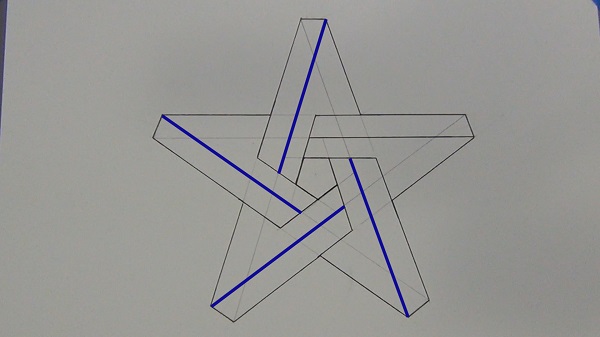
Now just erase the pencil line and we have an impossible star.
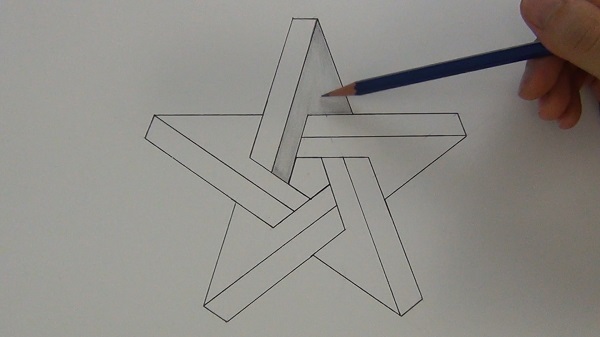
Step 3 – Shading Your Impossible Star
Now let’s add some shading to give this drawing some dimension. Let’s work on this branch first.
I’ll start by using an HB pencil to put down a base tone in this area. Then I’ll put dark gradations at these 3 areas to emphasize the fact that the branches of the star are overlapping.
Now, let’s move to this section and put a gradation at this end and this end with a highlight area in between.
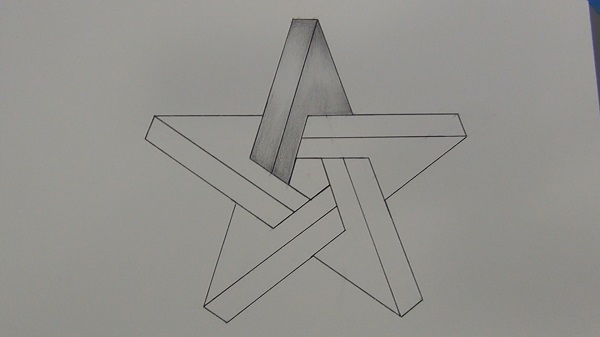
Next, let’s use a 2B pencil to go re-enforce the darker areas.
And now, we’ll just repeat this process for the other 4 branches.
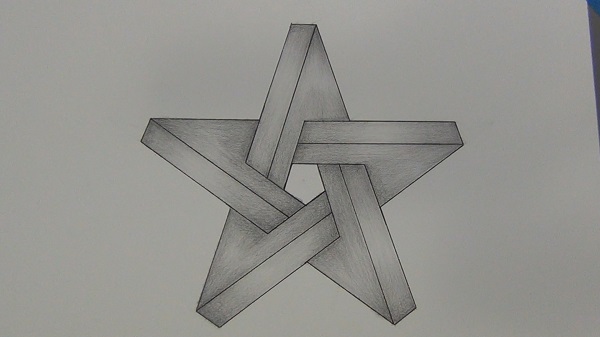
Lastly, I’ll take a 4B pencil and add some hard shadows to the areas where the star branches are overlapping. This little bit of detail will really make the drawing look much more 3 dimensional.

And now, let’s just put our signature on it and call it a drawing!


i know, great job
lol me
kkkk
I have spent hours and still can not get it …. I have tried several different ways to draw a star and can not get it equal. I would really like to learn how to do this because it looks really cool.
I tried to use graph paper and that worked out really well. You should try using that! Hope this helps!!
It really is easy when u get the hang of it! Easy steps and it turns out beautiful. Thank you!🌺😏💎🏅⭐️
it was very hard for me at first than it was very helpful ♡🌹🌿
this seems really hard bur after some practice got easy
Extremely well done with easy to follow instructions and simple guidance!! Very much appreciated. Thank you Maryx
COMMENT super!!
i know, great
I got it first try