
If you wanna learn more about portrait drawing, check out my “Portrait Fundamentals Made Simple” course.
It’s a very beginner-friendly course that walks you through all the basics of portraiture, from constructing a basic head, facial proportions, drawing the features, and finally drawing a realistic portrait step-by-step.
[UPDATE] Congratulation to Dorothy Burt for being the winner of the giveaway! Dorothy, I sent you a Facebook message. Please just reply with your shipping address and I will send out the prize right away.
Thank you to everyone for your support and participation! Please go here to see the current running contest: https://mydrawingtutorials.com/giveaway
Lesson Details
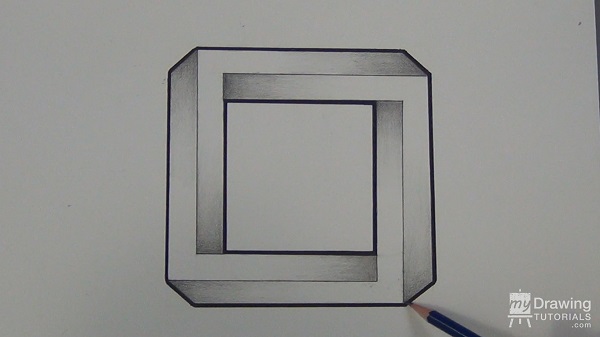
In this lesson, you’re going to learn how to draw a simple optical illusion called the impossible circle. Let’s get started!
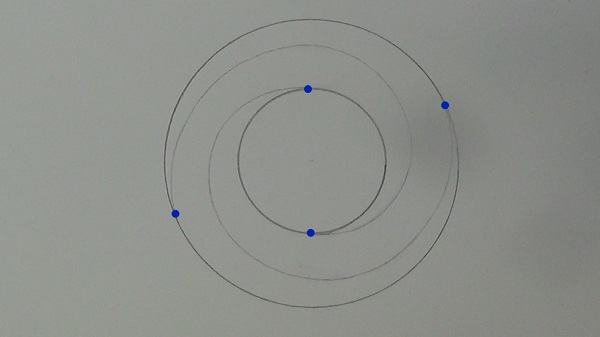
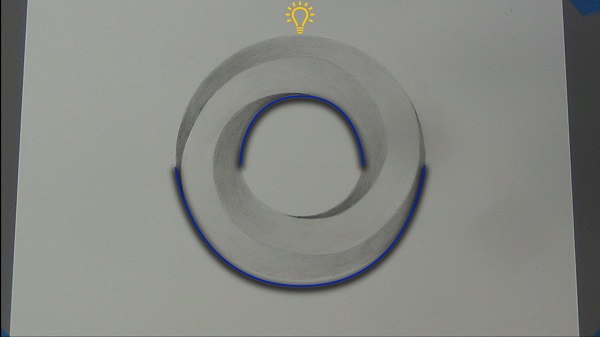
Step 1 – Draw Basic Circles
The first step is to draw a circle. Obviously, you can use a compass or a circle template to do this. But I’m going to show you a neat little trick to draw a perfect circle free-hand.
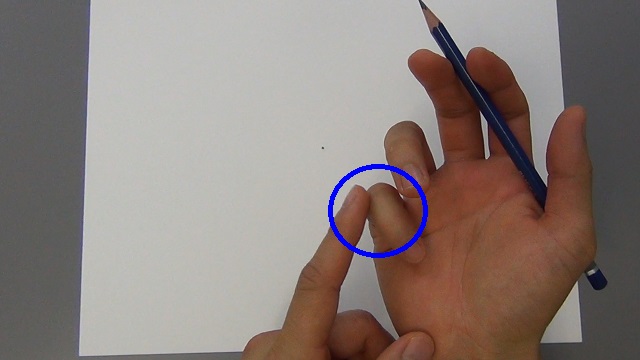
The way this works it that we are going to basically turn out hand into a compass.
First, mark an anchor point that will be the center of your circle. We will use this knuckle here as the pivoting point and place it on the dot.
Hold your pencil firmly so it doesn’t move and gently turn the paper with your other hand.
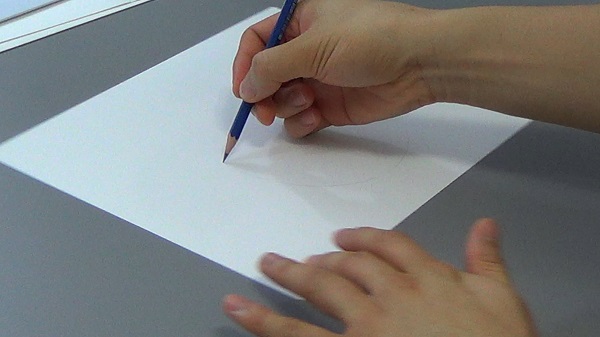
And you should end up with a perfect (or near perfect) circle.
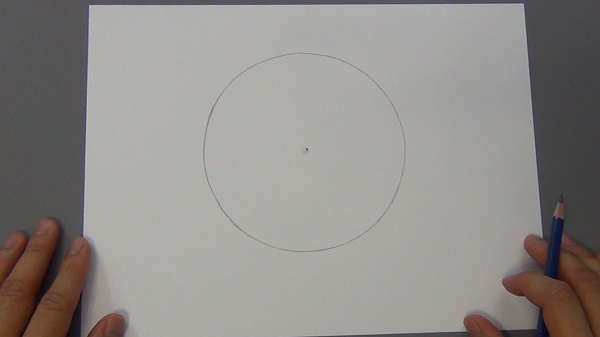
Next, we will draw a smaller circle inside this one. To do this, I will pivot off my finger. Of course, everyone’s hand is different so use whatever position is comfortable for you.
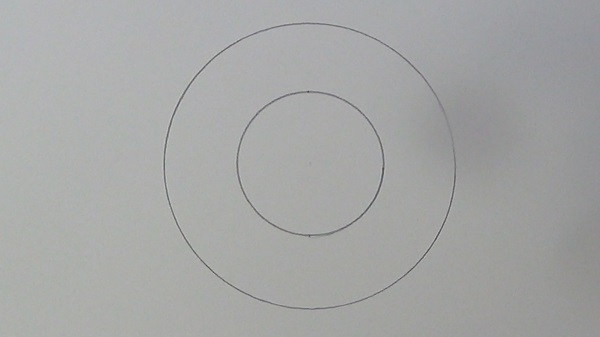
Then mark the north and south point of the smaller circle. Now draw 2 spiral-like curves from these points to large circle. There spirals can be a bit tricky so don’t be afraid to erase and re-draw them as many times as you need to get it just right.
Step 2 – Shading Your Impossible Circle
And now let’s add some finishing touches to this drawing.
I’ll add a gradation in these 2 corners with a highlight in between. I’ll use an 2H & HB pencil to put in the base tone.
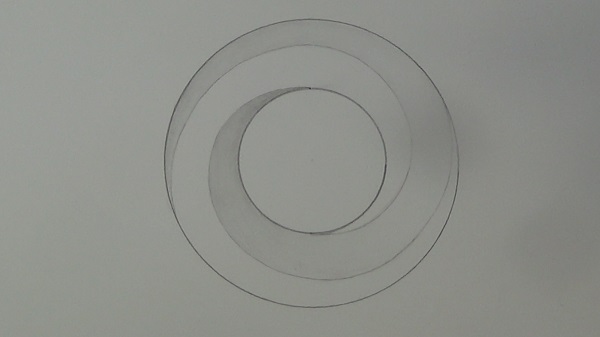
I want to lines of the circle to follow the pattern of the gradation as well, so I’ll lighten them with a kneaded eraser and then darken them as need during shading. The lines will be light where the shading is light and dark where the shading is dark.
Next, we’ll put in the same gradation on the other side.
Now I’ll use a 2B & 4B pencil to darken ends of the gradation even more.
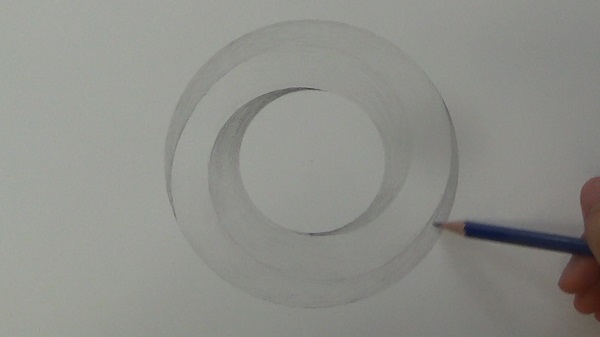
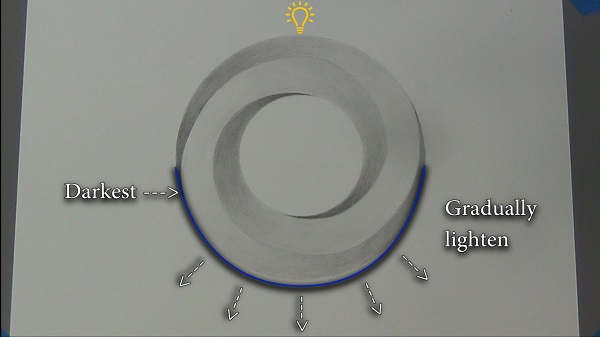
Step 3 – Adding The Shadow
And lastly, I want to make this circle look as if it is pop up from the page a bit. To do this, we’ll have to put in some shadows. Let’s imagine that the light source is coming from above. In which case, there will be a shadow cast in this area of the outer circle and in this area of the inner circle.
One thing to remember is that the shadow will be darkest when it’s near the object and gradually lighten as it move into the light. It’s important to capture this gradation.
Again, I’ll use a 2B pencil to put down a base tone first.
Now I’ll use a q-tip to soften the edge of the shadow and smooth out the shading.
And then I’ll use a 4B pencil to put in the really dark shadow right near the object.
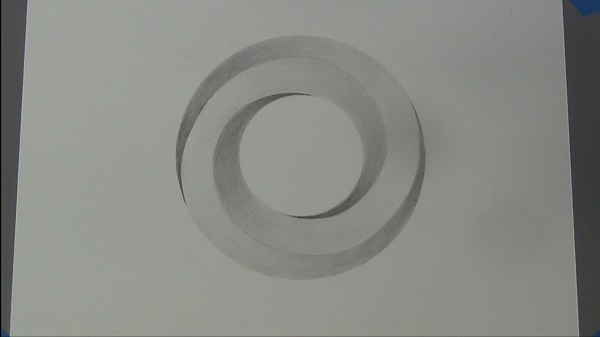
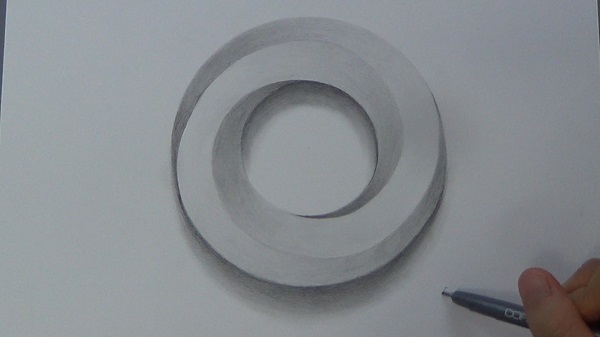
And we’re all done!
I hope you enjoyed this lesson. If you did, please help me out and share it with your friends on your favorite social network. Every likes and shares do a lot to support the channel and help me to keep putting out free videos like this one.


So cool!
Hi my name is vincent johansen i like to visit the kea’au high school
That is great! But are those fake?
very good
Very good !!
Wow
Beautiful, Great!!
Thank you….nice share!!
Your instructions are wonderful!!! Thank you very much for sharing these techniques.
good!!!!!!!!!!!!!!!!!!!!