
If you wanna learn more about portrait drawing, check out my “Portrait Fundamentals Made Simple” course.
It’s a very beginner-friendly course that walks you through all the basics of portraiture, from constructing a basic head, facial proportions, drawing the features, and finally drawing a realistic portrait step-by-step.
[UPDATE] Congratulation to Jason Luevano for being the winner of the giveaway! Jason, I sent you a Facebook message. Please just reply with your shipping address and I will send out the prize right away.
Thank you everyone for your support and participation! Please go here to see the current running contest: https://mydrawingtutorials.com/giveaway
Lesson Details
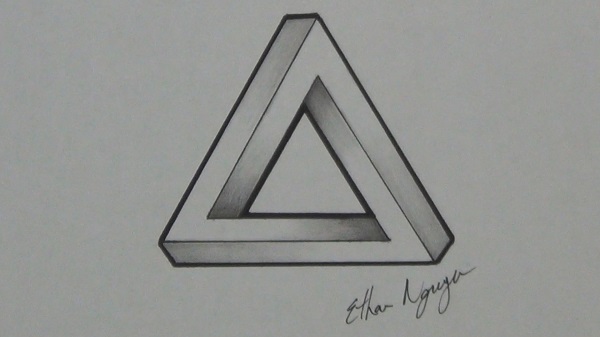
In this lesson, you’re going to learn how to draw a simple optical illusion called, “the impossible triangle.”
The reason is this illusion is called “the impossible triangle” is because it is a shape that can not actually exist in real life.
But despite the name, this illusion is actually very simple to draw. So let’s get started!
Drawing Materials
For this lesson, I’ll be using
- HB & 2B pencil
- 0.5 and 1.0 Copic Multiliner pen
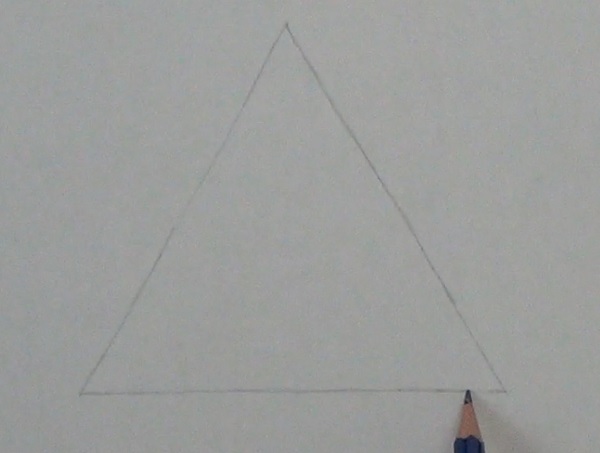
Step 1 – Drawing The Lay In
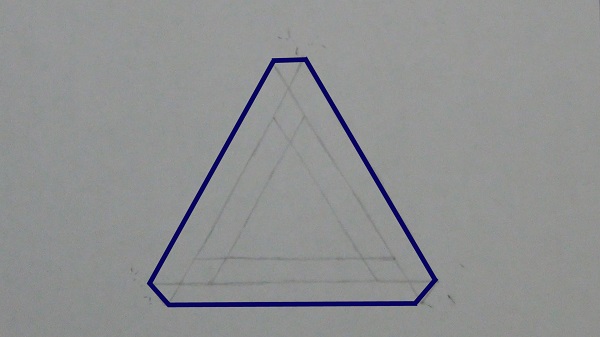
The first step is to draw a simple triangle. Try to make all the sides as uniform as possible.
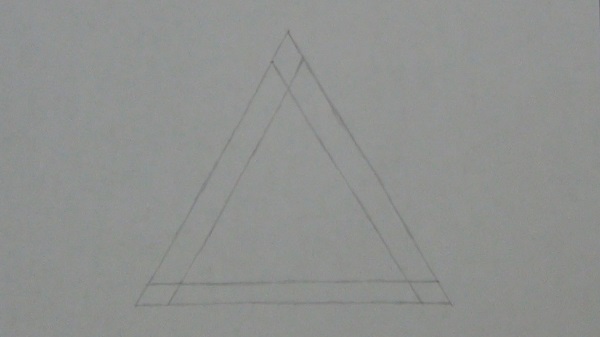
Next within the triangle you just drew, draw the 3 sides again to form a smaller triangle.
The gap between the larger and smaller triangle will determine the thickness of your impossible triangle. I try to keep this distance relatively thin so that my drawing does not get too crowded.
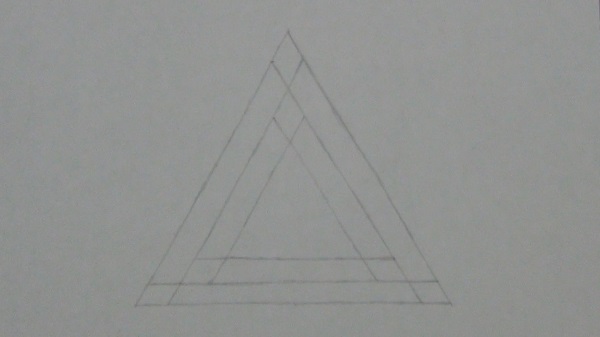
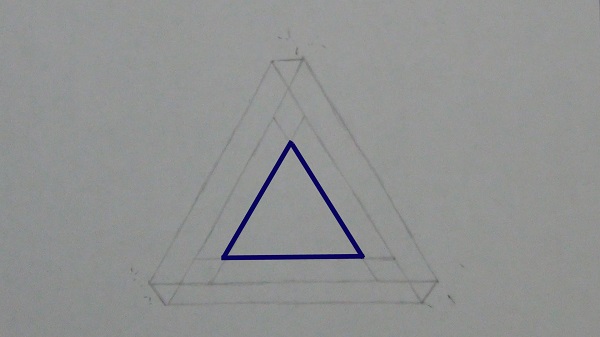
Repeat this process one more time to create a third (and even smaller) triangle.
Now go to each of 3 the diamond shapes at the outer corners of your drawing and put a short line through the middle of each.
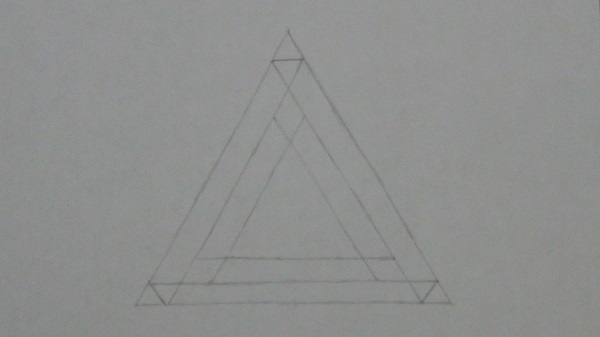
And that’s it! That’s all the lines we have to make. Our impossible triangle is in there somewhere. We just have to make it visible.
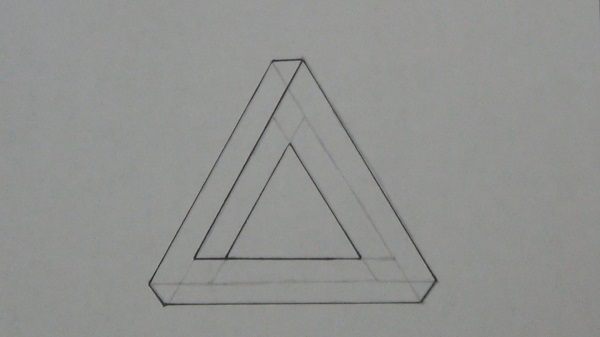
Step 2 – Make The Triangle Visible
First, erase the 3 corner tips of the larger triangle. Notice that we now have a large triangle-like shape at the outer edge of the drawing. And we also have a small triangle at the very center.
Let’s ink in these 2 shapes. I’m using a 0.5 Copic multiliner pen.
The ink on these pens take a few seconds to dry fully so be careful not to smudge them when you are drawing.
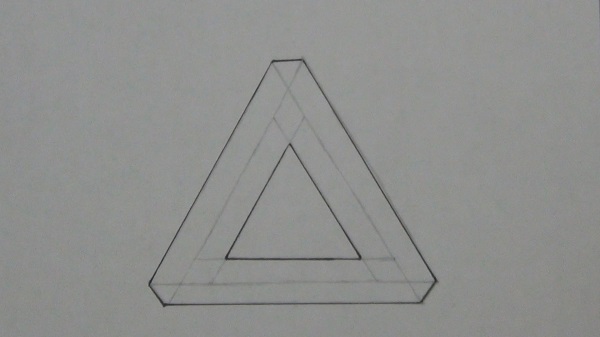
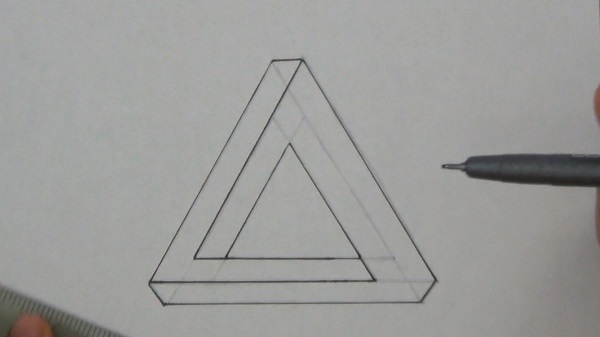
Now we just have to ink in the rest of the drawing. There’s a lot of lines here so it can get a bit confusing.
The best way to think about this is to imagine you are trying to get from the large triangle to the small triangle using these roads.

Here’s what I mean. Let’s start with this corner. Here we have a choice of 2 roads. For the first one, it doesn’t matter which road you pick. So let’s just go with the one on the left.
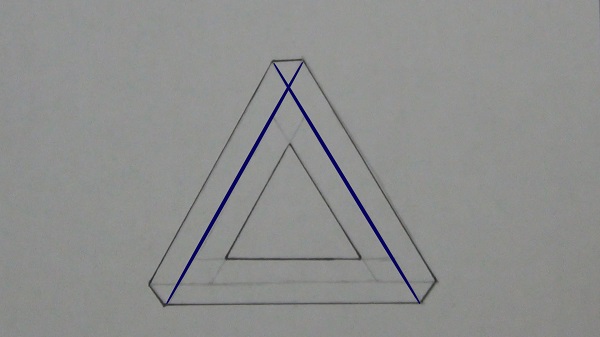
Follow this road down until you get to the far end of the small triangle and then make a turn to connect to it.
Now let’s do the same thing for this corner. Again, you have 2 roads to choose from. But since this one is already used, we’ll have to use the other one. And again, once you get to the far end of the small triangle, make a turn to connect to it.
And lastly, we’ll do the same for the 3rd corner.
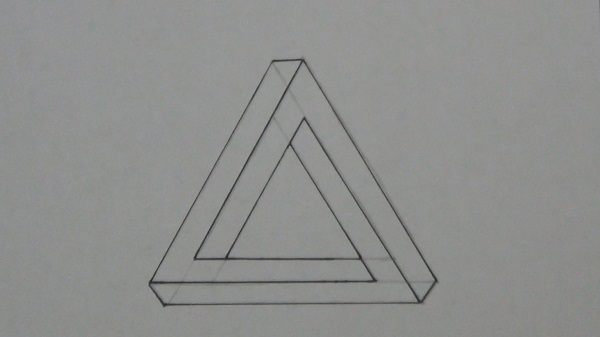
Now let’s wait for a minute for the ink to dry and then erase the pencil lines to reveal our impossible triangle.
Step 3 – Shading The Triangle
We are pretty much done with our triangle and you can stop here if you’d like. But I’m going to add a few finishing touches to make it really pop.
I’ll use a 1.0 size pen to create a thick outline at the outer edge and the center of the triangle.
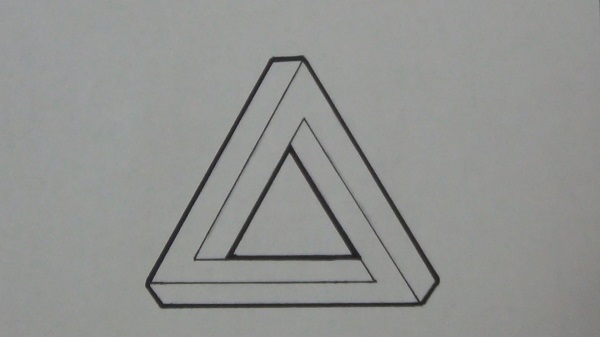
And lastly, let’s add some shading. We’ll use a 2B pencil to put a gradation at the 3 inner corners of the triangle.

Then, let’s add a lighter gradation at the 3 outer corners.
And we’re all done!
I hope you enjoyed this lesson. If you did, please help me out and share it with your friends on your favorite social network. Every likes and shares do a lot to support the channel and help me to keep putting out free videos like this one.
And speaking of videos, I release a new one every Friday, so don’t forget to SUBSCRIBE so you don’t miss out!


this helped so
much thank you!
I did not understand
I didn’t understand either
very interesting to follow the process/thrilling.
Thank you for sharing your great drawing.
Thank you for posting great drawings to learn from.
You’re very welcome, Malca! I’m glad you enjoyed it.
when you make the triangles its throws us off. when you make the corners different try using different colors after all the triangles are made so we can copy it
Hi Ronald,
Thank you for clarifying. I think I see what you are saying… so when I’m drawing the 3 triangles inside each others, the lines gets a bit confusing and it would help if I used different colors to draw those lines… is that right?
Amazing artworks mate, keep on updating different kind of artworks.
I liked your impossible triangle optical Illusion and I drawed it and it turns out it was AMAZINGLY GOOD I draw every day after school and i draw in the weekends I like you videos your the best.