
If you wanna learn more about portrait drawing, check out my “Portrait Fundamentals Made Simple” course.
It’s a very beginner-friendly course that walks you through all the basics of portraiture, from constructing a basic head, facial proportions, drawing the features, and finally drawing a realistic portrait step-by-step.
Lesson Detail
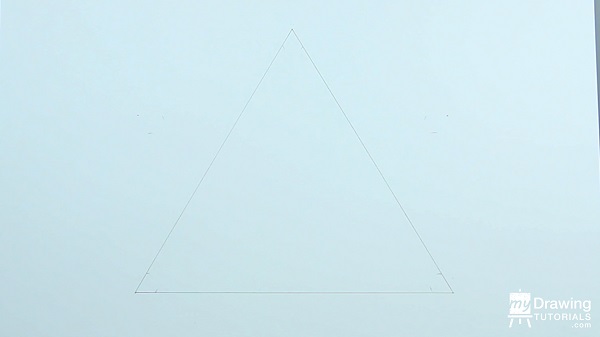
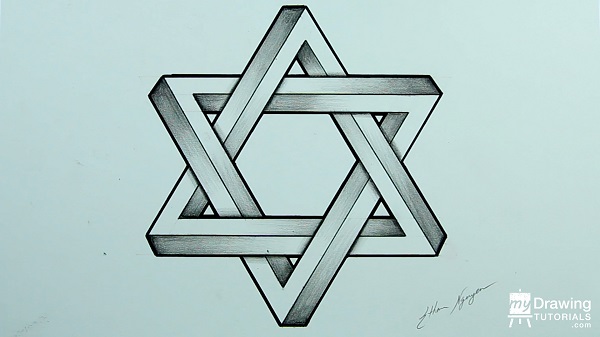
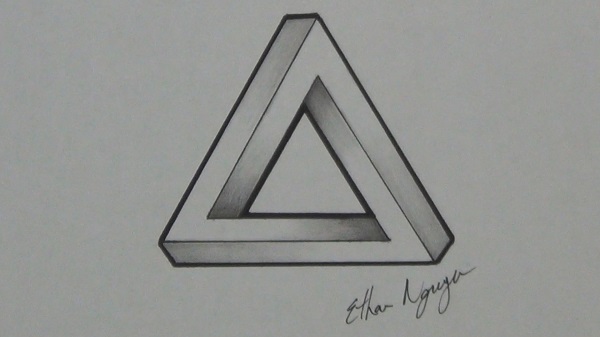
Step 1 – Draw 1st Impossible Triangle
This impossible star will be made up for 2 impossible triangles, so the first step is to draw the first impossible triangle.
By the way, I made a whole video on how to draw an impossible triangle. If you find yourself wanting more detailed instructions, click here to watch it.
OK, back to the drawing…
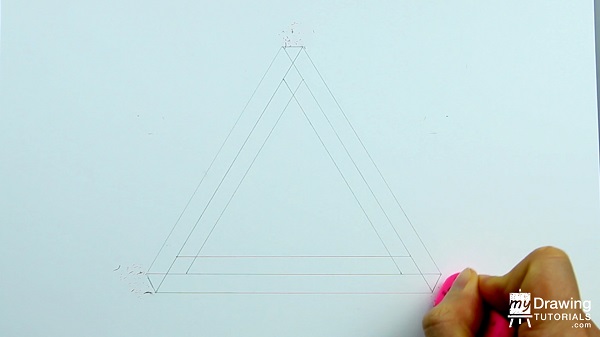
First, draw a simple triangle with all the sides being equal.
Next within the triangle you just drew, draw the 3 sides again to form a smaller triangle.
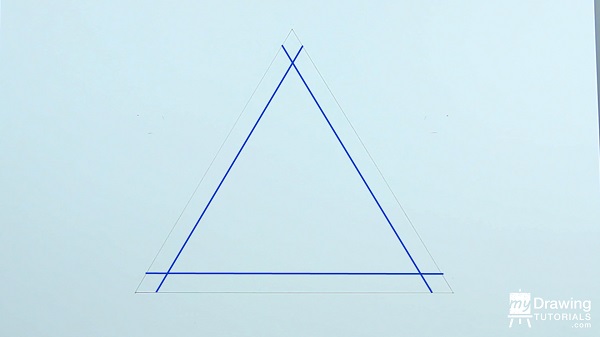
The gap between the larger and smaller triangle will determine the thickness of the shape. To keep the drawing from getting too overcrowded, I recommend keeping this gap relatively thin.
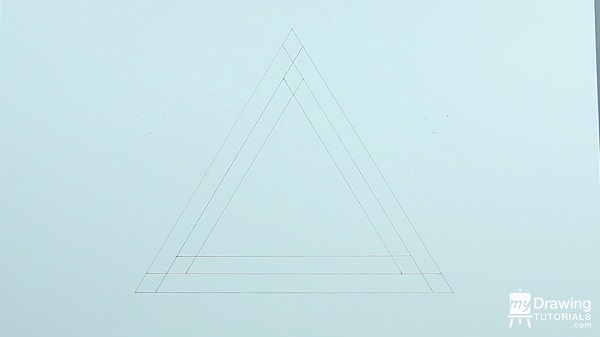
Repeat this process one more time to create a third (and even smaller) triangle.
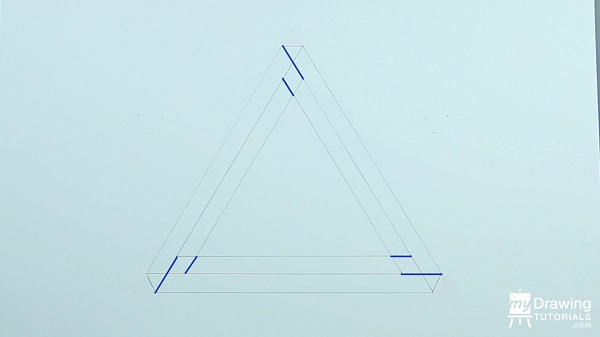
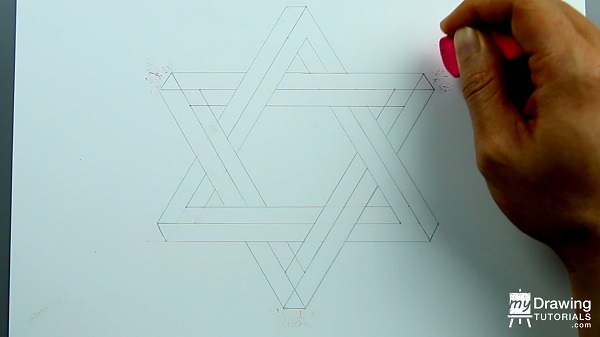
Now go to each of 3 the diamond shapes at the outer corners of your drawing and put a short line through the middle of each.
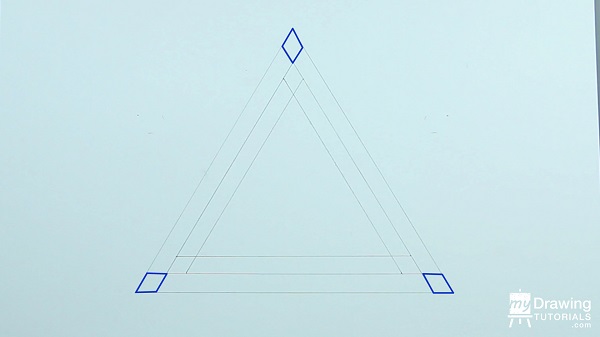
Now erase the 3 corner tips.
Next, erase these lines here to complete the impossible triangle.
If you want a more detailed explanations of which lines to erase, check out my “Impossible Triangle” video.
Step 2 – Draw 2nd Impossible Triangle
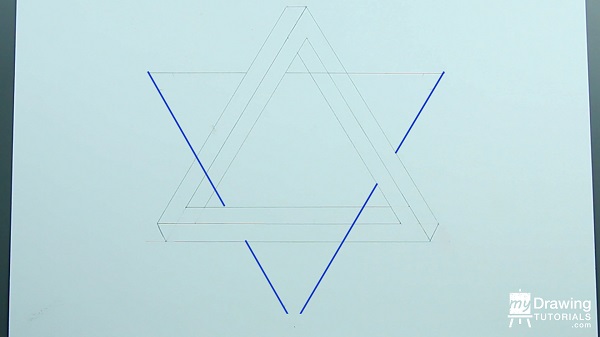
Alright, we just finished the first impossible triangle. Now, let’s draw another one, except this time, we’ll flip it upside down.
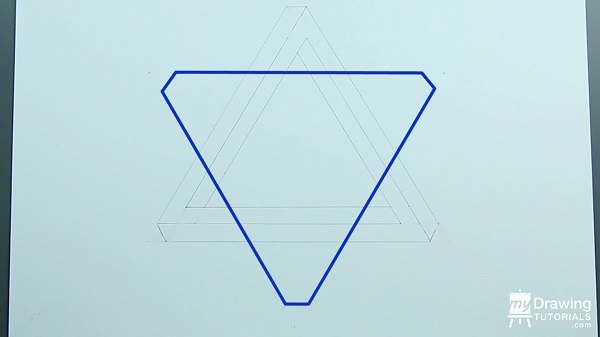
I’ll go about one-third of the way down and draw a horizontal line for the base of the new triangle. One key detail is that this line will interweave with the old triangle. In other words, the line will go under the old triangle and then over it.
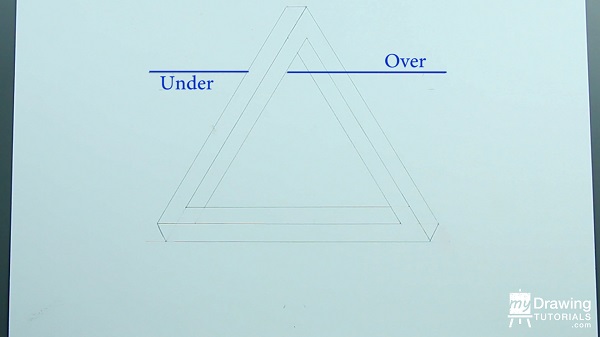
And let’s draw the other 2 sides of the triangle while still following this over-and-under pattern.
Next, just like last time, we’ll draw the sides of the large triangle again to form a smaller triangle. And of course, you’ll still want to follow the over-and-under pattern.
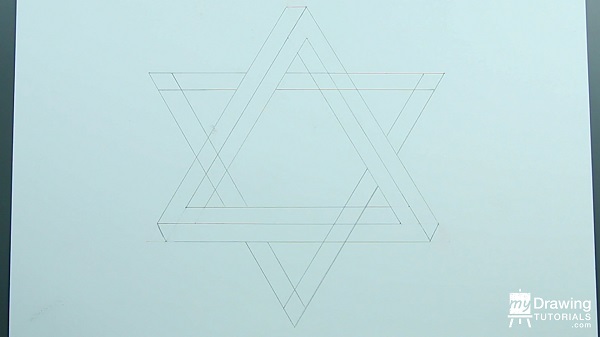
Repeat this process one more time to form a third triangle.
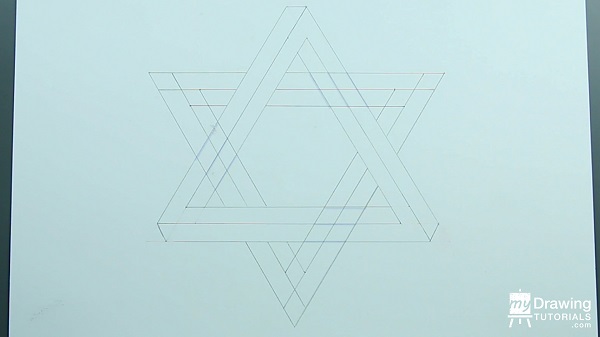
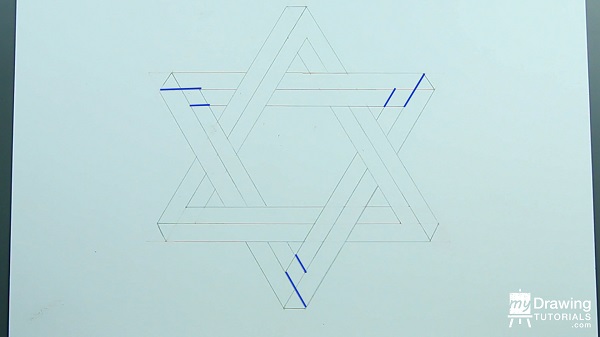
Now go to all the places where the second triangle overlaps the first and erase the lines of the first triangle.
You can see how this makes the two triangles look like they are interwoven with each others.
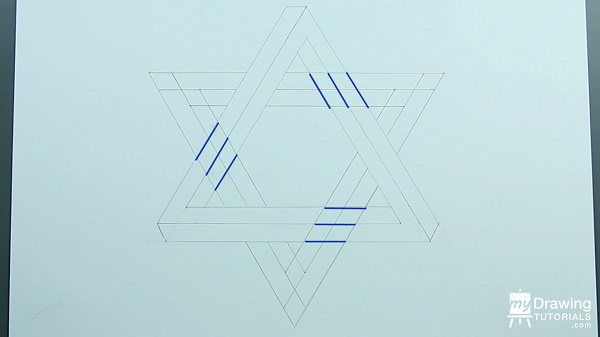
Next, close off the corners of the second triangle and erase the tips.
And lastly, erase these extra lines.
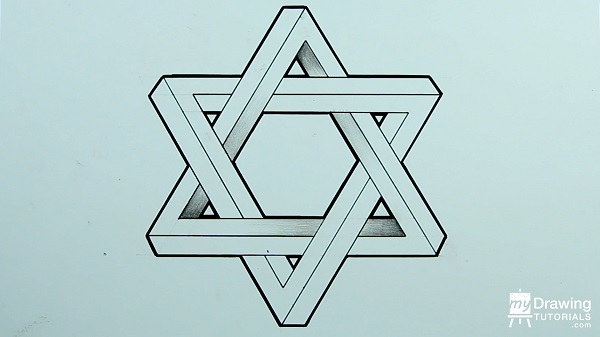
Step 3 – Inking & Shading Impossible Star
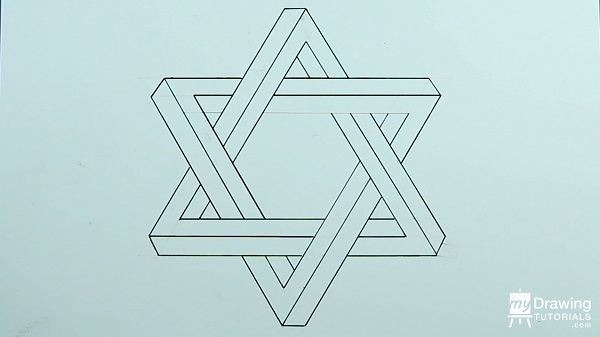
And that’s it! We have our Impossible Star of David. Let me ink it in so you can see it more clearly.
Now I’ll take a Sharpie marker and put a thick border on the outside of the shape to make it pop more.
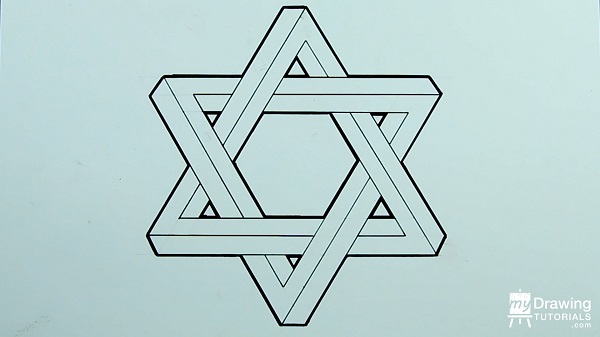
Now for the shading. I’ll take a 2B pencil and put a gradation at the three inner corners of the first triangle like so.
Then I’ll put a gradation at the three outer corners.
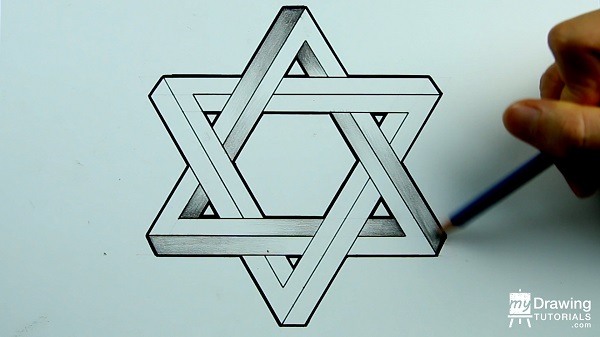
And I’ll repeat the same process for the second triangle.
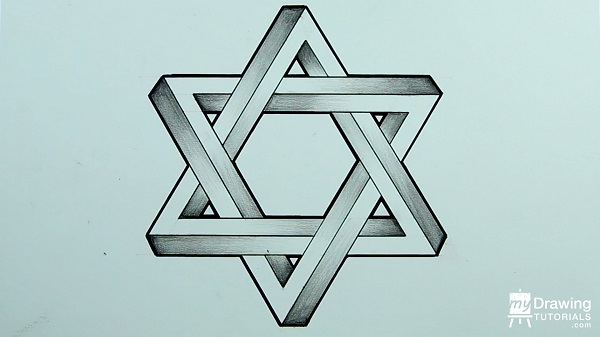
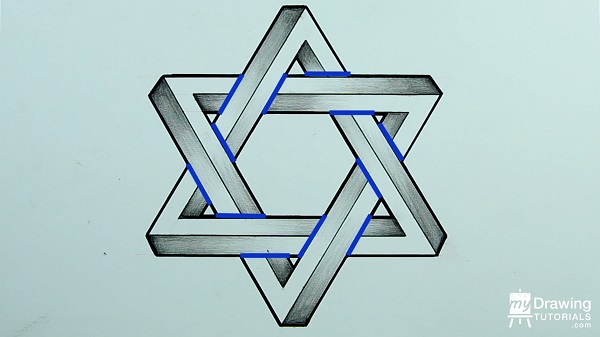
And lastly, to make the drawing look even more three dimensional, I’ll put a shadow in all the areas where the two triangle are overlapping each others.
And that’s it, we’re all done!


