
If you wanna learn more about portrait drawing, check out my “Portrait Fundamentals Made Simple” course.
It’s a very beginner-friendly course that walks you through all the basics of portraiture, from constructing a basic head, facial proportions, drawing the features, and finally drawing a realistic portrait step-by-step.
Lesson Detail
So if you never painting before, it can seem a little complicated and intimidating. But I want to show you that if you know the right method and procedure, painting can actually be easier than drawing!
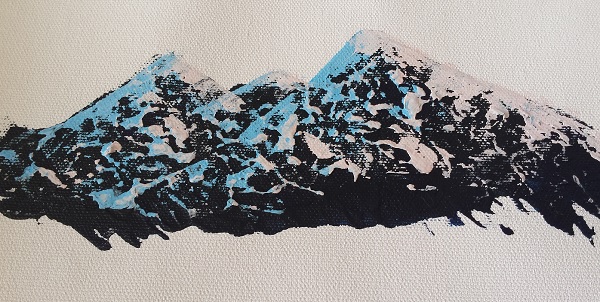
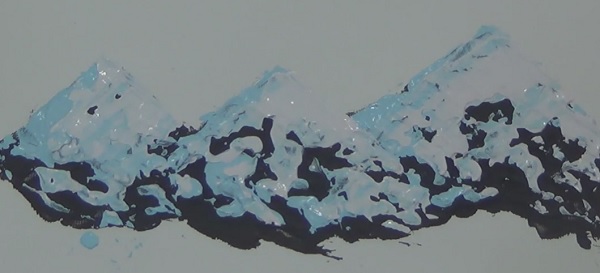
In this lesson, you’re going to learn how to use a really simple painting technique to create realistic looking mountain ranges. The painting will look something like this:
Painting Materials
All you’re going to need for this tutorial is…
– a palette knife
– black, white, blue, and red paint
– and some light molding paste (optional) (The light molding paste used in the lesson is from an acrylic medium package by Golden Artist Colors. You can find it here.)
Step 1 – Create Rocky Texture
The first step is to mix some black acrylic paint with some light molding paste to create a thick mixture that we can use to create some rough texture.
Then load this thicker mixture onto your palette knife and use it to fill out the foundation of our mountains. You’ll want to lay on a lot of paint and make it really thick.
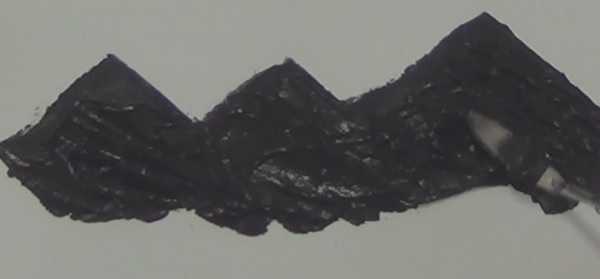
Once you have the overall shape, use your palette knife to create a lot of bumps in the paint. The point is to create a really rough texture to mimic the jagged surface of the mountains.
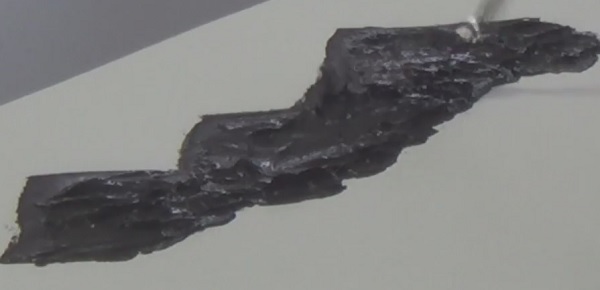
Now, make sure to let the paint dry completely before going on to the next step. Because we put on a lot of paint, this can take a while (1 – 2 hours) so be patient.
Step 2 – Putting in the Cool-Color Snow
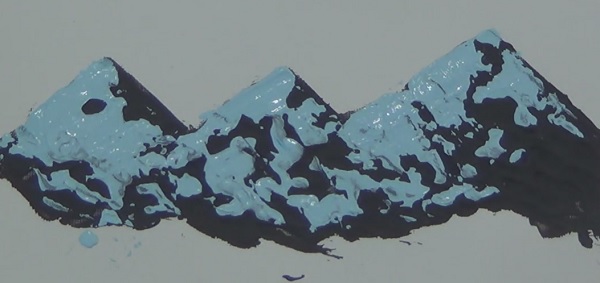
We are going to put on a blue-ish layer of snow on the shaded side of the mountain (left).
Mix a little bit of blue paint with a lot of white paint to create a light blue mixture. Then load some of it on your palette knife and scrap it across the left side of the mountain ranges.
Keep your pressure light and just let the palette knife glide over the bumps. We want to get a “hit and miss” effect with the paint.
Step 3 – Putting in the Warm-Color Snow
Now we are going to do the same thing for the other side of the mountains. Except this time, we will be using a warm color.
Mix a little bit of red with a lot of white paint to create a light pink color. Then load it on your palette knife and drag it across the right side of the mountains.
Once again, keep a light touch in order to not fill in all the gaps and achieve that “hit and miss” effect.
And that’s it, you’re all done!
(You may notice that this mountain range looks slightly different from the one at the very beginning of this lesson. This is due to the fact that I used a different type of paper.
For the image at the top of the post, I used a rougher texture acrylic painting canvas. This allowed the paint to grip the surface more and created more texture.
In the painting in the video, I used a much smoother watercolor paper. This caused the painting to not have as much texture and resulted (I think) in a less realistic painting.
So just as a head’s up, you’ll want to use proper acrylic painting paper for this exercise and avoid smooth papers.)
If you are not already subscribed to my email newsletter and Youtube channel, be sure to do it now. I release a new lesson very week and you’ll be notified when it comes out:
Sign Up To My FREE Art Newsletter
Subscribe To My Youtube Channel
I hope you enjoy this lesson. If you did, please help me out and share this with your friends on your favorite social network.
It might not seem like much, but every share does a lot of support the site and helps me to keep putting out more free lessons like this in the future.
Also, if you have any question, comment, or feedback, please let me know in the comment below. I will try to reply to very comment!


