
If you wanna learn more about portrait drawing, check out my “Portrait Fundamentals Made Simple” course.
It’s a very beginner-friendly course that walks you through all the basics of portraiture, from constructing a basic head, facial proportions, drawing the features, and finally drawing a realistic portrait step-by-step.
Lesson Details
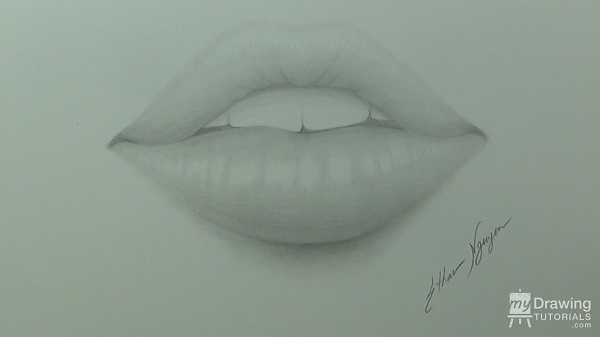
Step 1 – Mark the Proportions of the Lips
The first step is to decide how wide you want your drawing to be and place 2 horizontal dots on your paper. These dots will represent the outer corners of the lips.
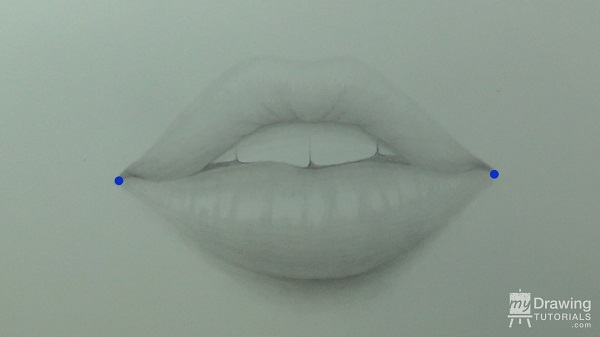
Next place 2 vertical dots on your paper. These dots will represent the top and bottom point of your lips.
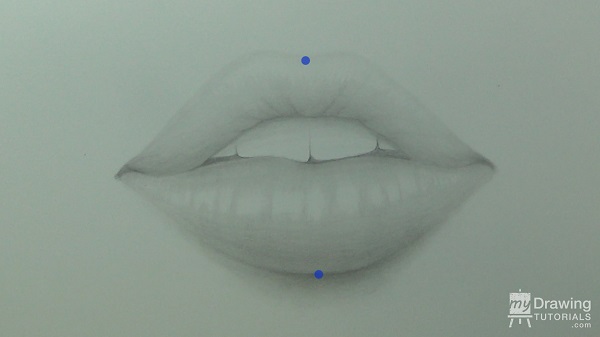
Be sure to keep the height and width of these dots proportional to that of your reference. In this case, I notice that in my reference, the width is about 1.7 times the height so I match that same proportion.
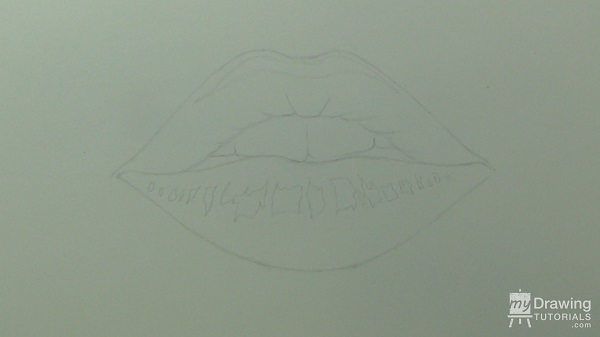
Step 2 – Sketch the Lay-in
Now use these dots as a guide and lightly sketch in the layout. In case you’re wondering, I’m using an HB pencil. The layout is the foundation of your drawing so before moving forward to the shading stage, double check your lines and make any necessary corrections.
Notice that on the upper lip, there are these little cracks and wrinkles. Be sure to include these details.
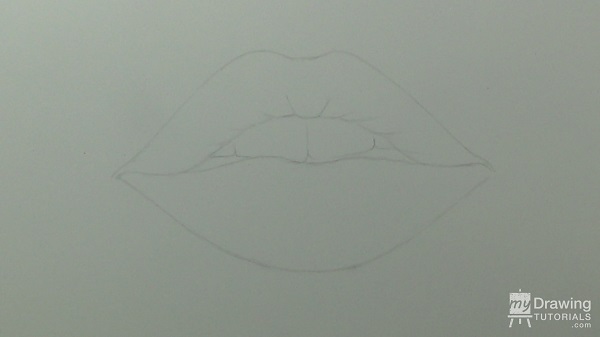
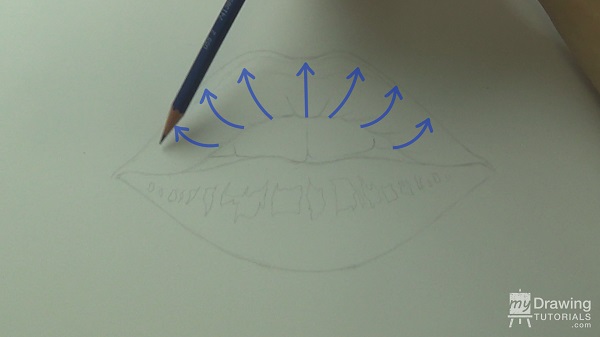
Next, let’s figure out where the highlights are going to be. The light source is coming from above so there will be a highlight on the areas of the lips that are protruding out the most. In this case, that would be this part on the upper lip and this part on the lower lip. Let’s lightly mark out these highlight areas.
I’m making these highlights very dark so that you can see them in the video, but for your drawing, keep the lines extremely light. Just enough for you to see them.
OK, now for the fun stuff: shading!
Step 3 – Shading the Lips
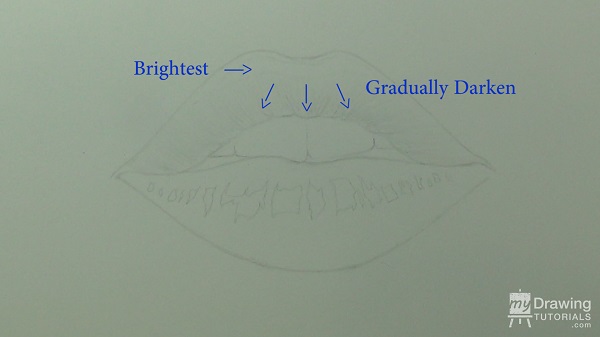
To give the lips some texture, I’m going to use vertical lines and shade with the contour of the lips.
And of course, I’m shading around the highlight areas.
I want to create a gradation where the tone is brightest in the highlight area and gradually darkens as it moves away.
Now let’s repeat this same process with the lower lip.
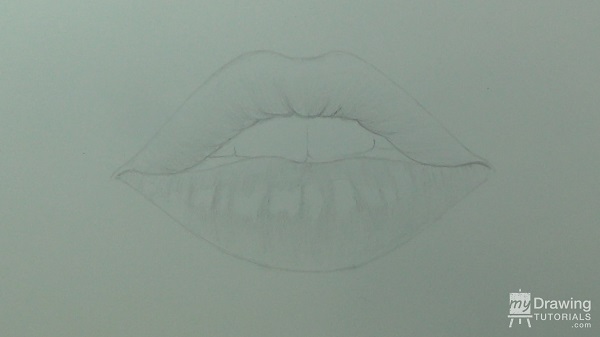
I don’t want the outline of the lips to stand out. Instead, I want it to blend in with the shading so that it looks more realistic. So let’s lighten the outline of the lips with our kneaded eraser.
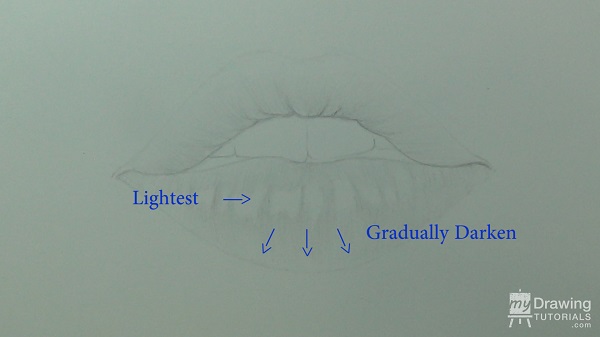
Once again, for the lower lip, I want to create a gradation where the tone is lightest in the highlight area and gradually darkens as it moves away.
Next, let’s fill in the gap of the mouth and the corner of the lips with a dark shadow.
There’s a shadow underneath the bottom lip. This shadow is the dark at the center and gradually fades out as it moves towards the corners.
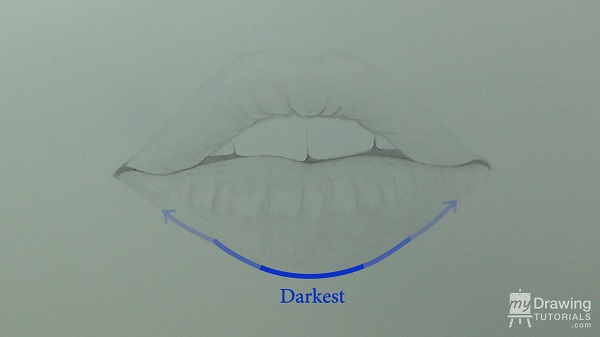
Let’s put in this shadow.
And then, we’ll put in some shading on the teeth. This is a shadow that is cast onto the teeth by the upper lip.
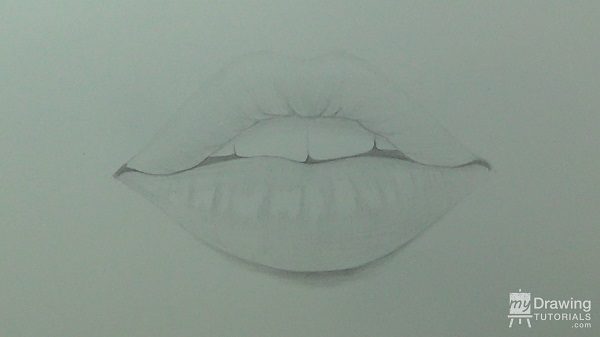
Now, I’m going to take my tortillions and smooth out all the tones.
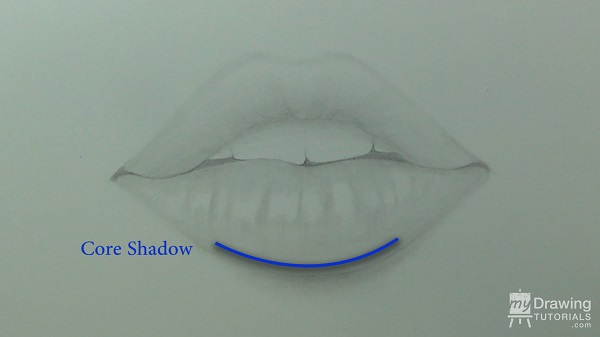
Lastly, let’s add in the the core shadow for the lower lip in this area.
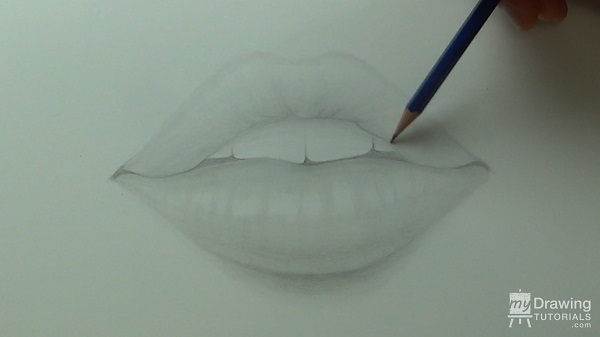
And now it’s just a matter of going back and forth between the pencil and the tortillion and refining the drawing, smoothing out the gradation, and adding more contrast to make everything more 3 dimensional.
Now let’s just put our signature on it and call it a drawing!

![Drawing Realistic Portrait Series [1 of 8] – Intro & Materials](https://mydrawingtutorials.com/wp-content/uploads/2012/08/Portrait-Lesson-1.jpg)
![Drawing Realistic Portrait Series [2 of 8] – The Fundamentals of Shading](https://mydrawingtutorials.com/wp-content/uploads/2012/08/Portrait-Lesson-2.jpg)


